How To Cook Quail Eggs

How To Cook Quail Eggs
If you’ve ever struggled with how to boil or peel eggs, you’re no doubt, wondering how to do this successfully with these peanut M&M size eggs.
These creamy, higher nutritional value, spotted little eggs can be a bit tricky. But with a few easy pointers we will have perfectly soft, medium, or hard boiled quail eggs that will yield a creamy yolk, with perfect whites.
THE DO NOTS
In order to identify what not to do, it’s important to narrow down the goal in this specific task. My goal is to show you how to easily peel the shell and cook to your desired yolk consistency.
To be successful, make sure to select the right eggs to begin with. If you haven’t purchased or checked your eggs yet, start with this here to see if your eggs are good to eat.

Make sure your eggs are still edible! A guide here to help you determine if they’re good.
Here are some tips to help us be successful with boiling perfect quail eggs every time.
Do Not start the eggs in cold water.
Do Not skip the ice water bath.
THE PRO’S FOR LEARNING THIS ‘HOW-TO’
Quail eggs are fun to work with. If you’ve ever purchased canned eggs, the best part about learning this simple step is being able to eat fresh quail eggs. It’s also an additional skill in your culinary arsenal.
THE METHODS
Save your egg whites! Hot boiling or steaming method works best.
Hot vs Cold
I was a firm believer in the cold water method for the longest time. I’d add a splash of vinegar because the eggs would have a little white cloudy stuff leak out and it acted like glue.
Voila- no more cloudy stuff at the end of my egg. Problem solved right? Wrong.
As much as I loved this method, peeling was always a bit painful. It wasn’t until I switched to the hot water method that I realized I was doing it wrong. Both methods cooked the egg, but why would it matter if half my egg white was being removed in the process?
Enter in improved methods.
Method #1:
Use an appropriate type pot for your eggs. Quail eggs are smaller so a small saucepan would more than likely suffice depending on how many you’re boiling. Either way, just make sure there is adequate room, don’t cramp them.
Bring your water to a rolling/hard boil. Once it boils, pull the pot aside and using a slotted spoon, place your eggs in gently. Bring it back to the stove top and continue to boil. This is important to note that the egg whites will pull from the shell making it easier to peel.
Method #2:
Use a steamer basket. Once your water is boiling, place the quail eggs on a steamer basket, insert into the pot and cover with a lid.
This method is great because the shock of heat (again) peels away from the shell. The porous shells don’t touch water making it easier to avoid egg white cloudy messes. It keeps the integrity of the white and yolk, making for a creamier center and a softer white. Win-Win
WHAT TYPE OF YOLK
Runny: 2 minutes
Soft Boiled: 3 minutes
Hard Boiled: 4 minutes
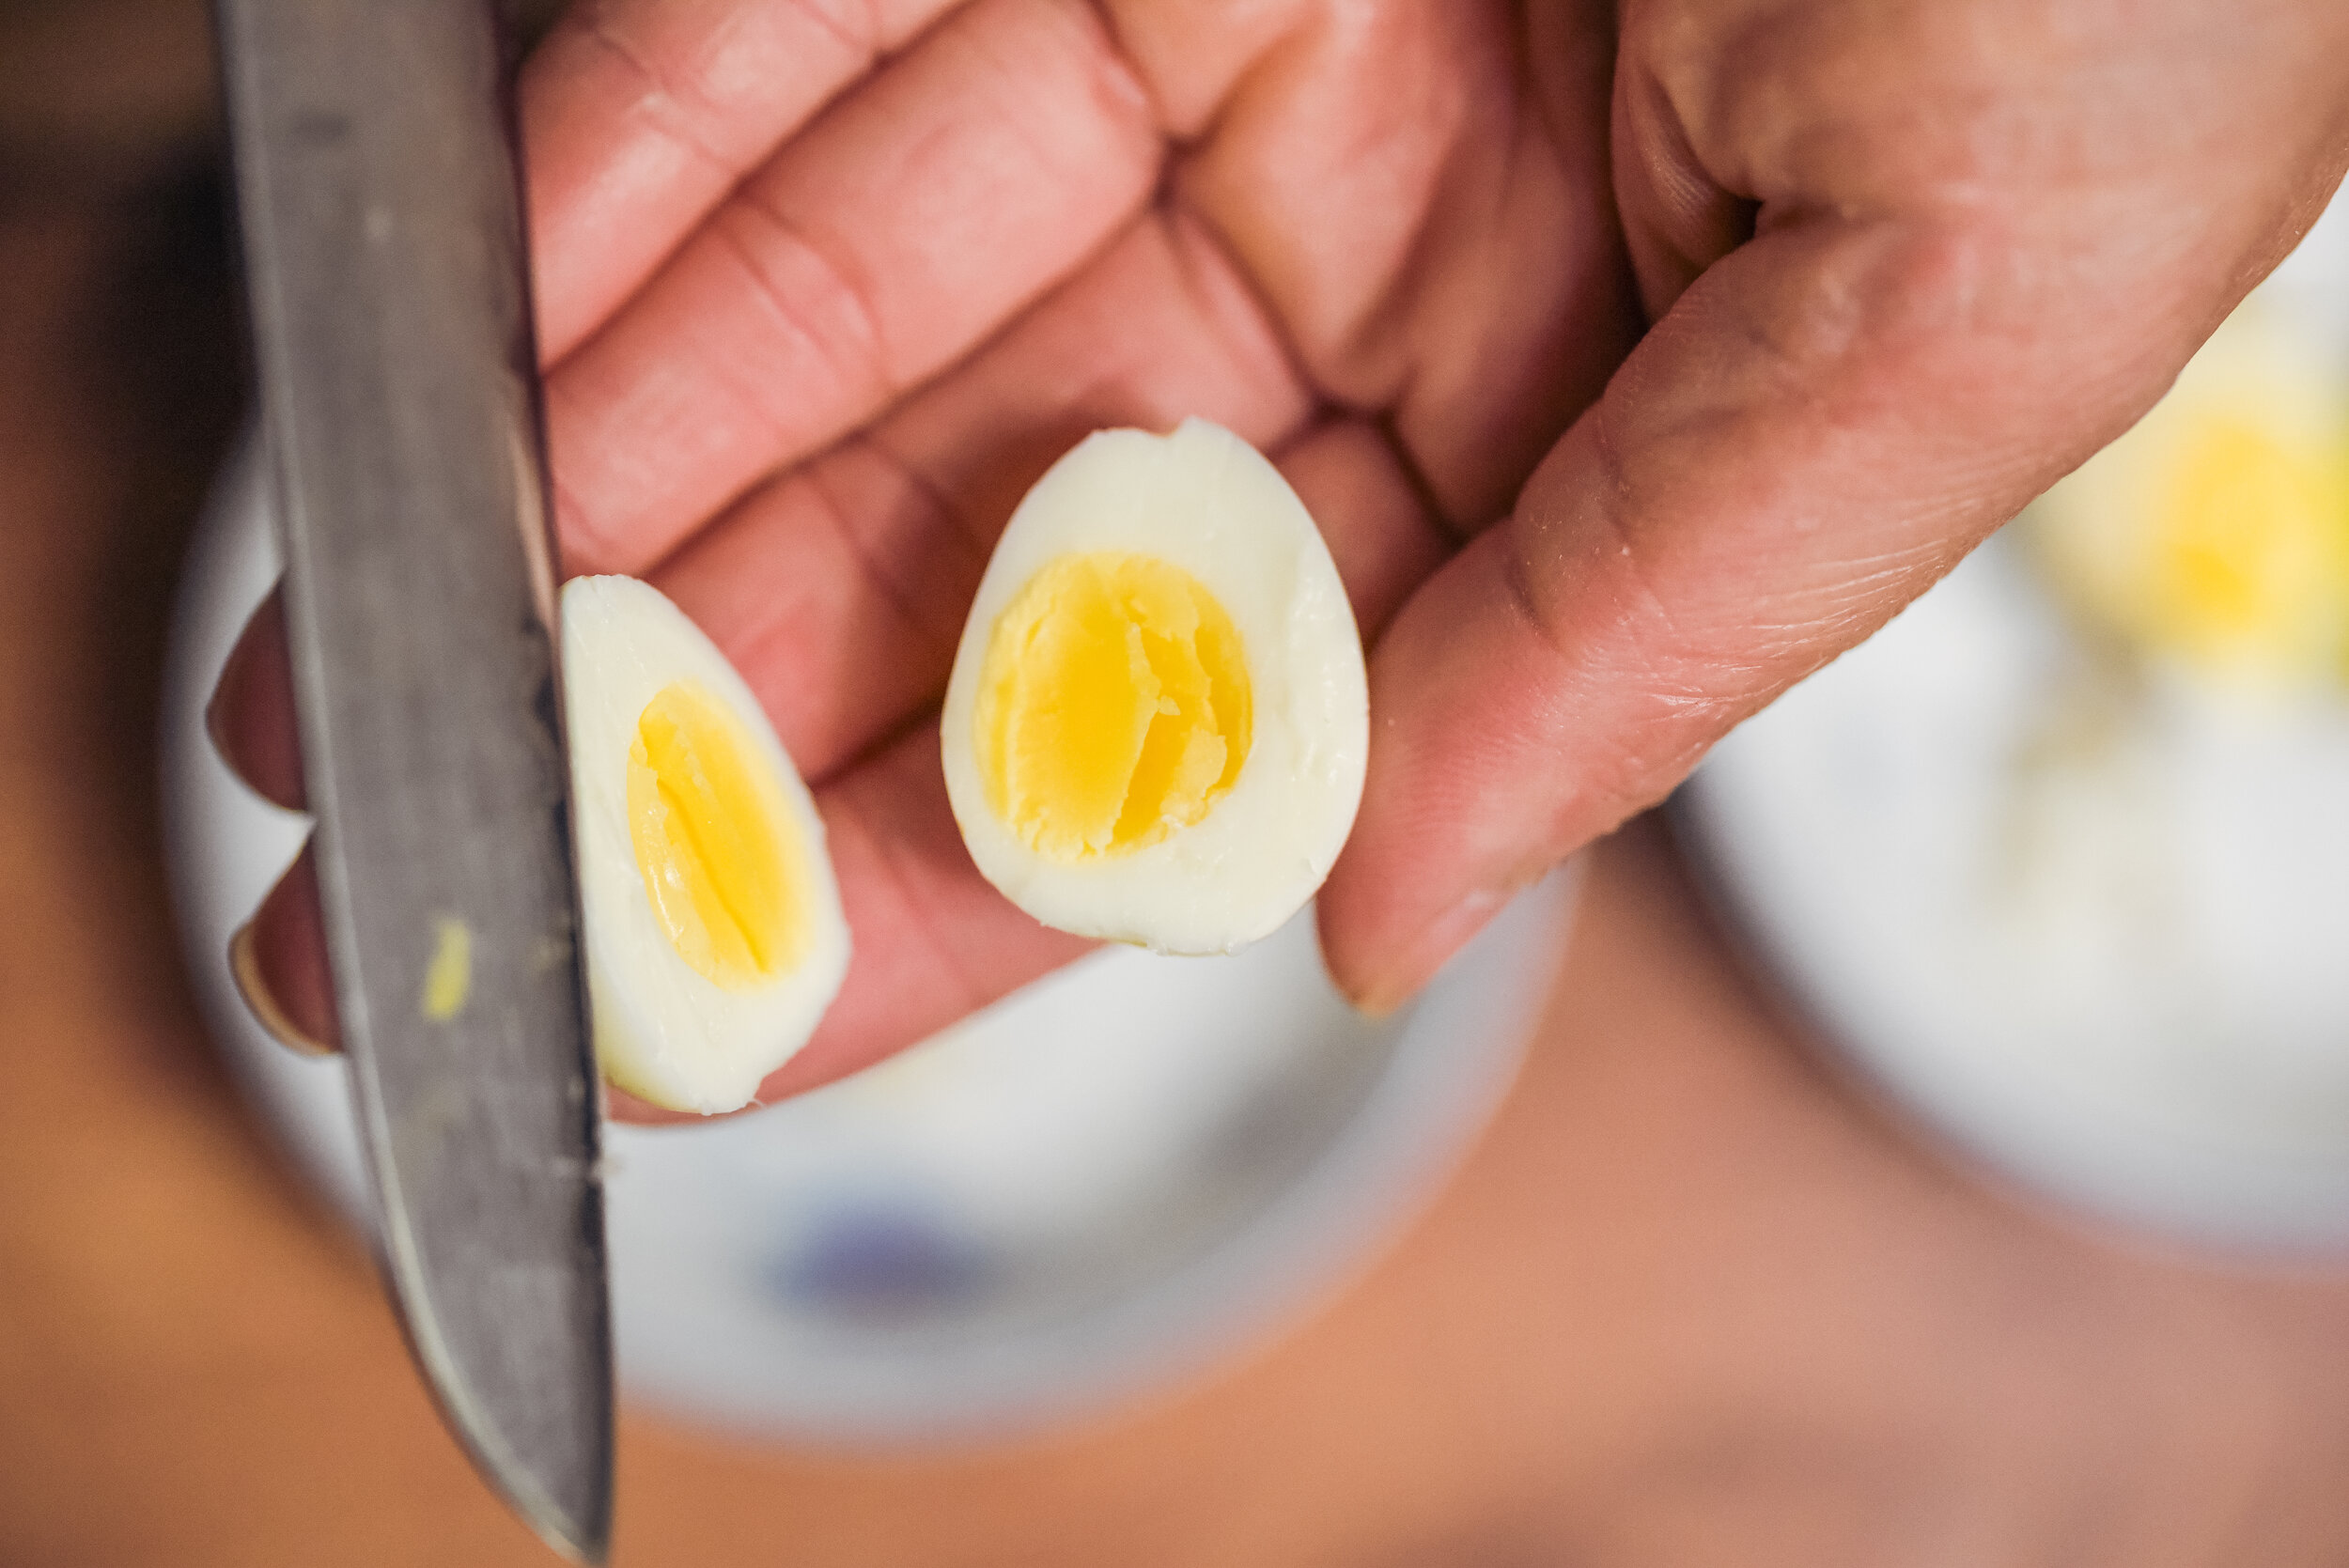
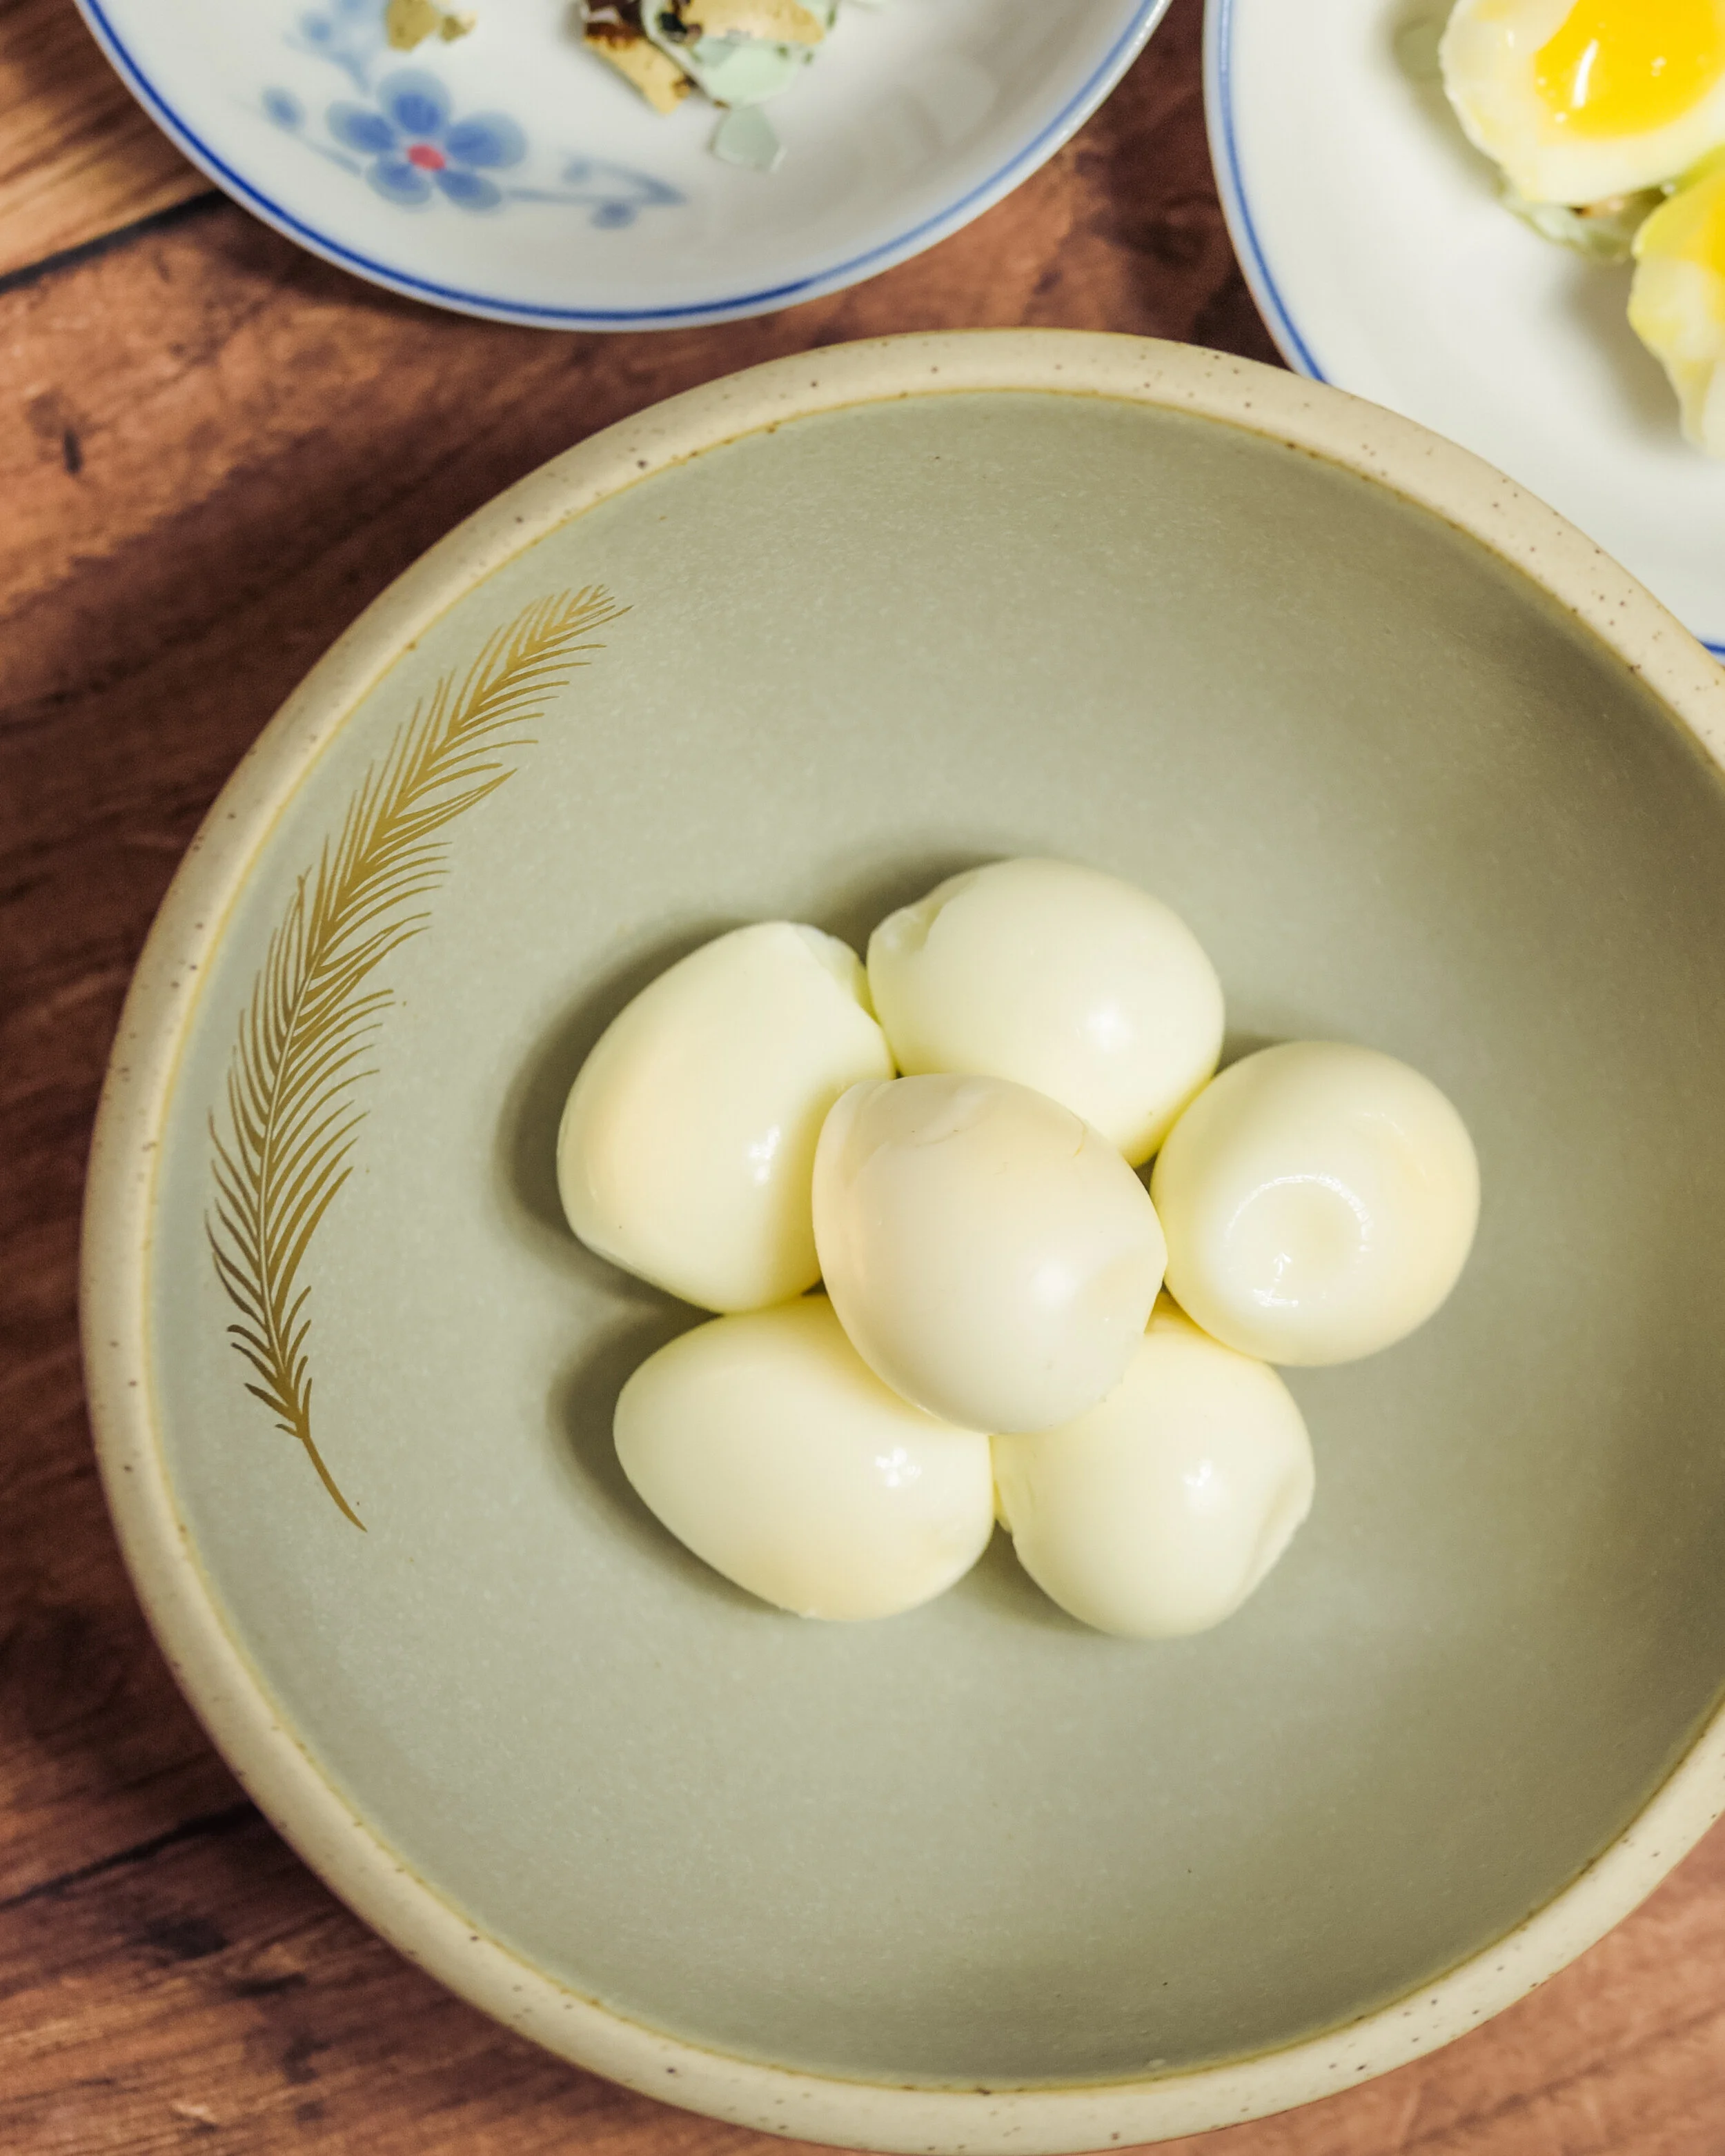
Hard boiled quail eggs take 4 minutes.
ICE BATH
There’s no doubt that an ice bath post boil is absolutely necessary. These eggs are small and much like blanching spinach or anything else, it continues to cook.
An ice bath prevents your runny yolk from becoming soft boiled, and your soft boiled from becoming hard boiled.
Make sure to drain the hot water and immediately dunk in your eggs. A simple bath of ice cubes and water will help you protect your precious little quail eggs and give you a bit of culinary freedom.
BREAKING THE SHELL
You don’t need to arm wrestle the shells, but you don’t need to be gentle like a butterfly either. These eggs are smaller, but shaking them around in a bowl once the ice bath is done will help you remove the shells quickly and easily.
When in doubt start from the wider base of the quail egg and peel to the point. It’s where the membrane detaches easiest.
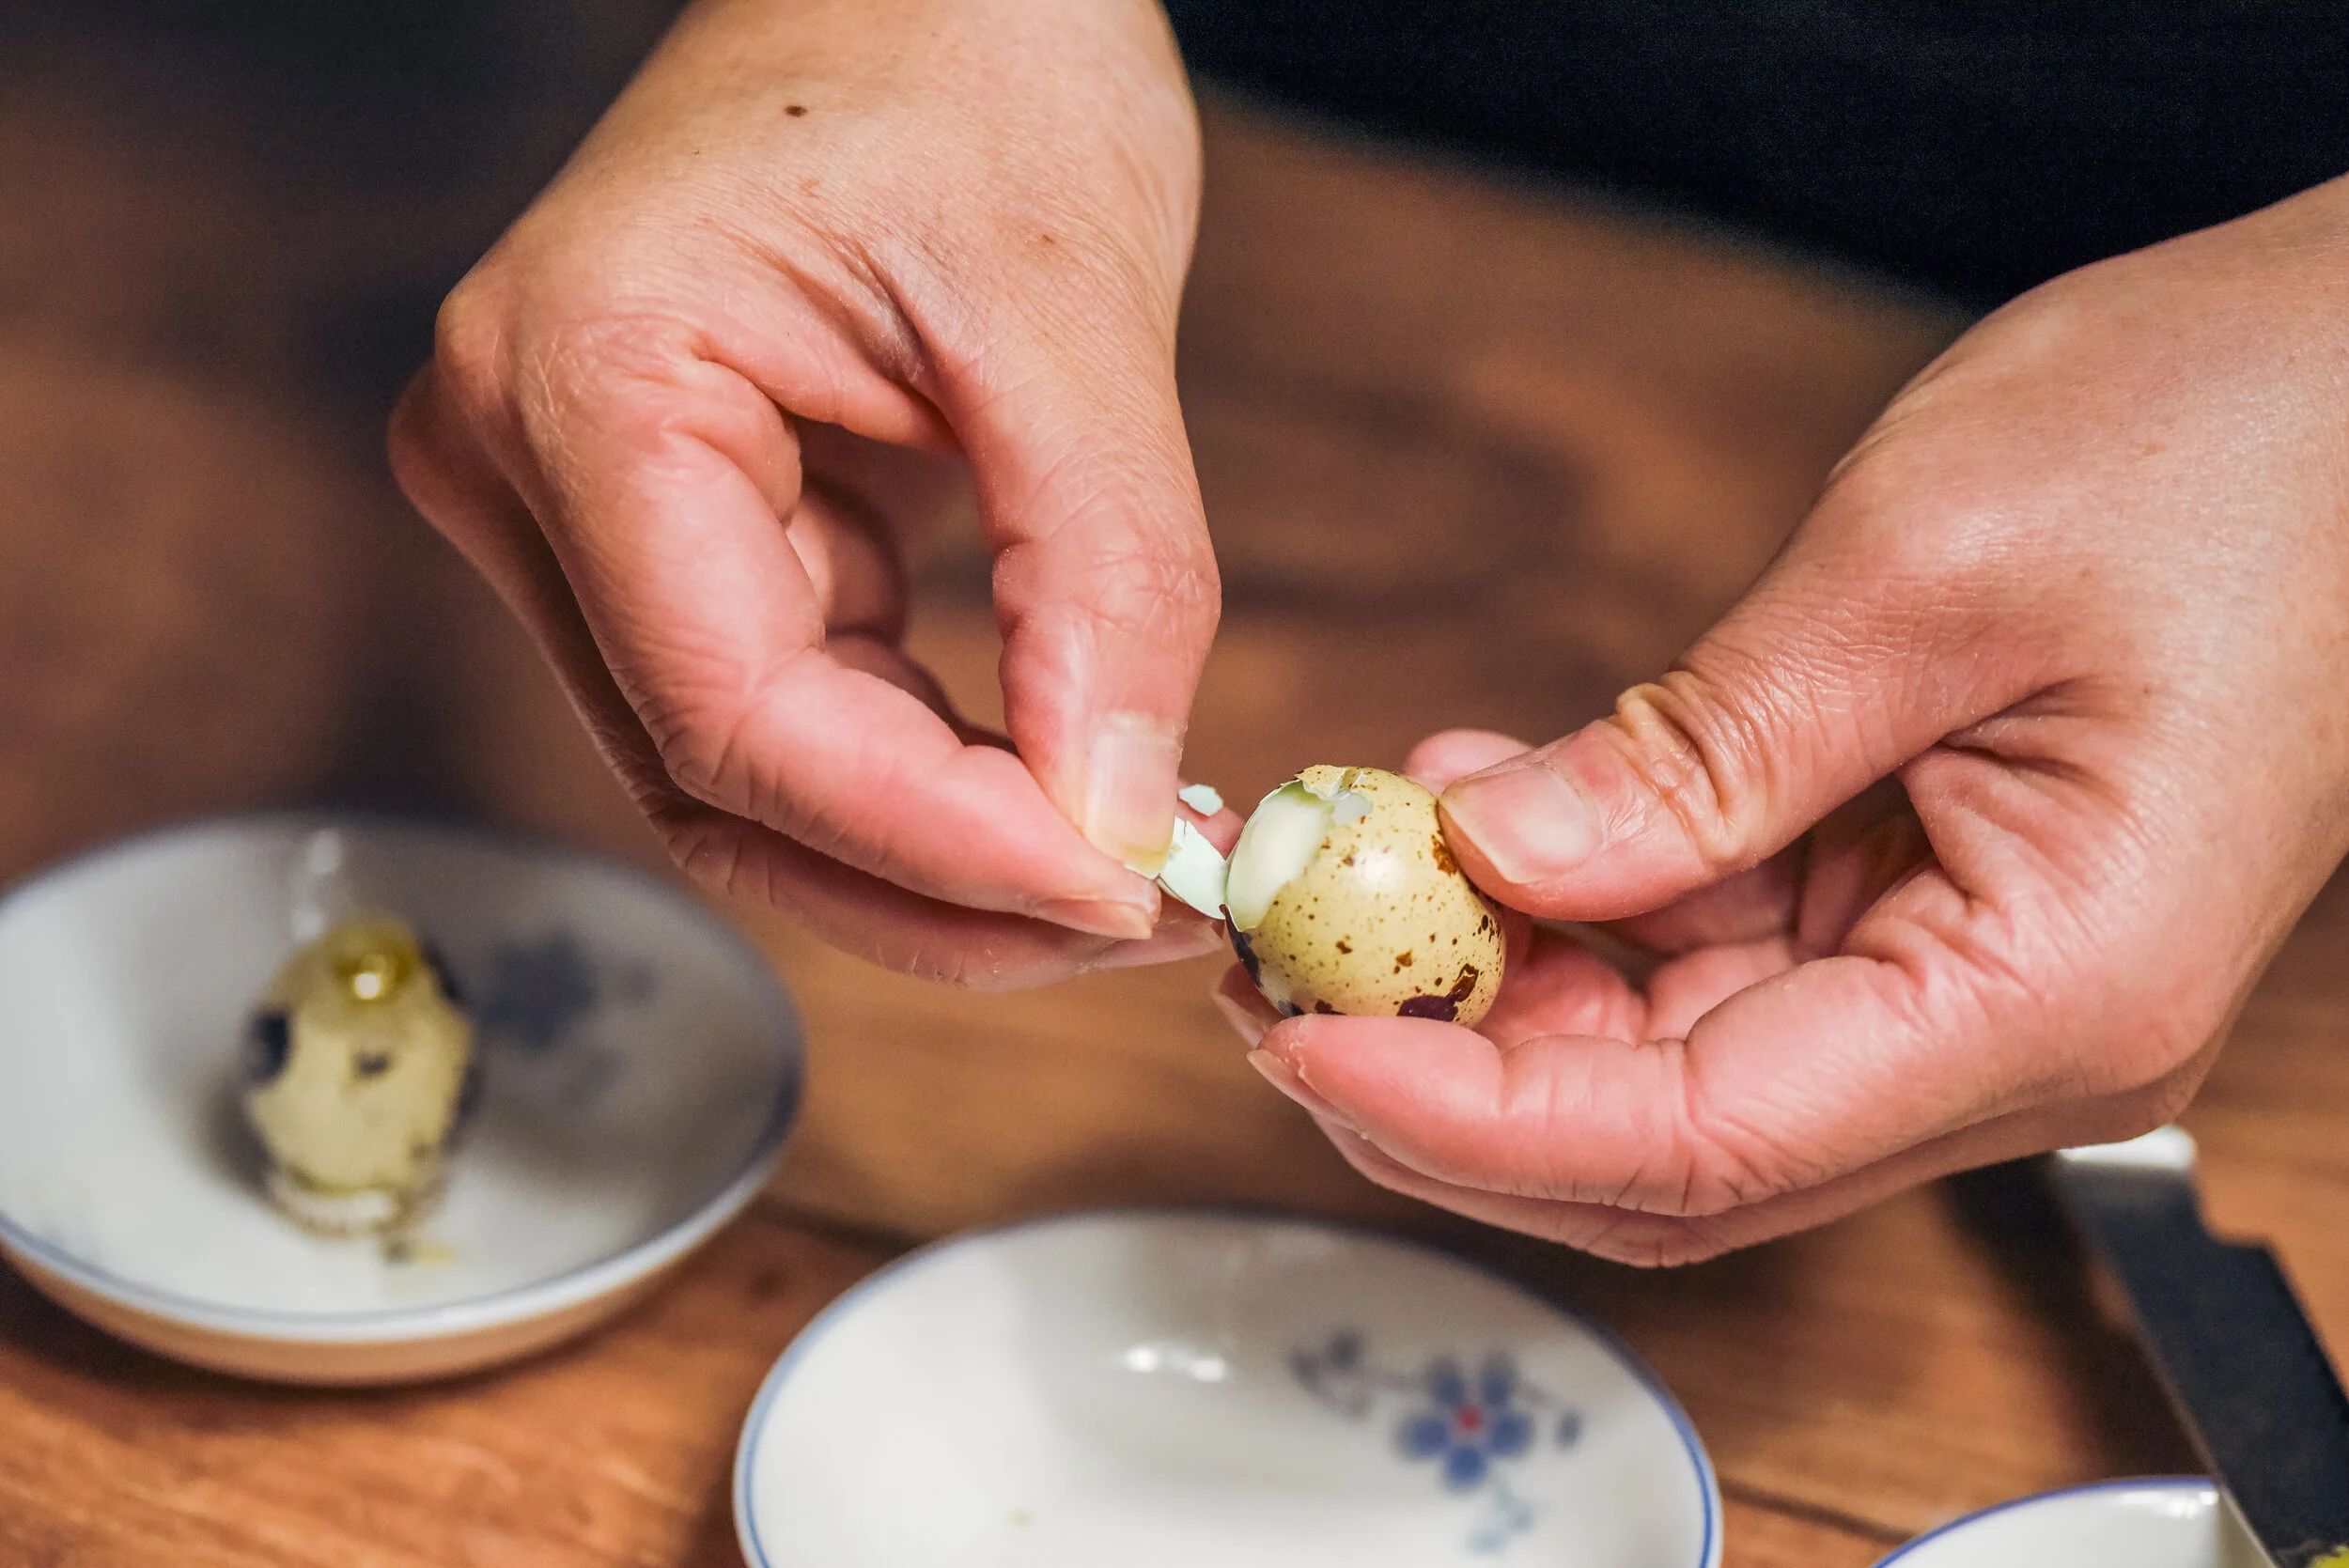
When in doubt peel your quail egg from the bottom up. The membrane detaches easiest here.
FINAL THOUGHTS AND NOTES:
Once your eggs are peeled, enjoy them fresh or refrigerate for up to 7 days in the fridge.