How-To Butterfly Chicken Quarters

How-To Butterfly Chicken Quarters
We are butterflying this chicken and keeping the bone in. When we cook with bone in it really helps us to maintain a juicier and more flavorful chicken.
Boneless is easier to eat, but once you try it bone-in and butterflied, you’ll agree it’s a game changer.

Butterflying chicken quarters is a game changer. It allows us to marinade the leg and makes it easier to share it!
WHY ARE WE LEARNING ‘HOW-TO’ Butterfly?
There are many reasons we want to learn how to butterfly chicken quarters. It’s a gateway to learning how to butcher meat.
Butterflying chicken quarters gives us a lot more freedom in how we utilize this piece in recipes.
It’s going to give us more surface area for the coveted, crispy, crackly, sounding chicken skin. The legs are easier to enjoy and you can actually share it- once it's been butterflied.
It is way easier to marinade legs when they’ve been cut and makes cooking time a breeze. Lastly, it’s really fun to do and we get to become a butcher for a bit.
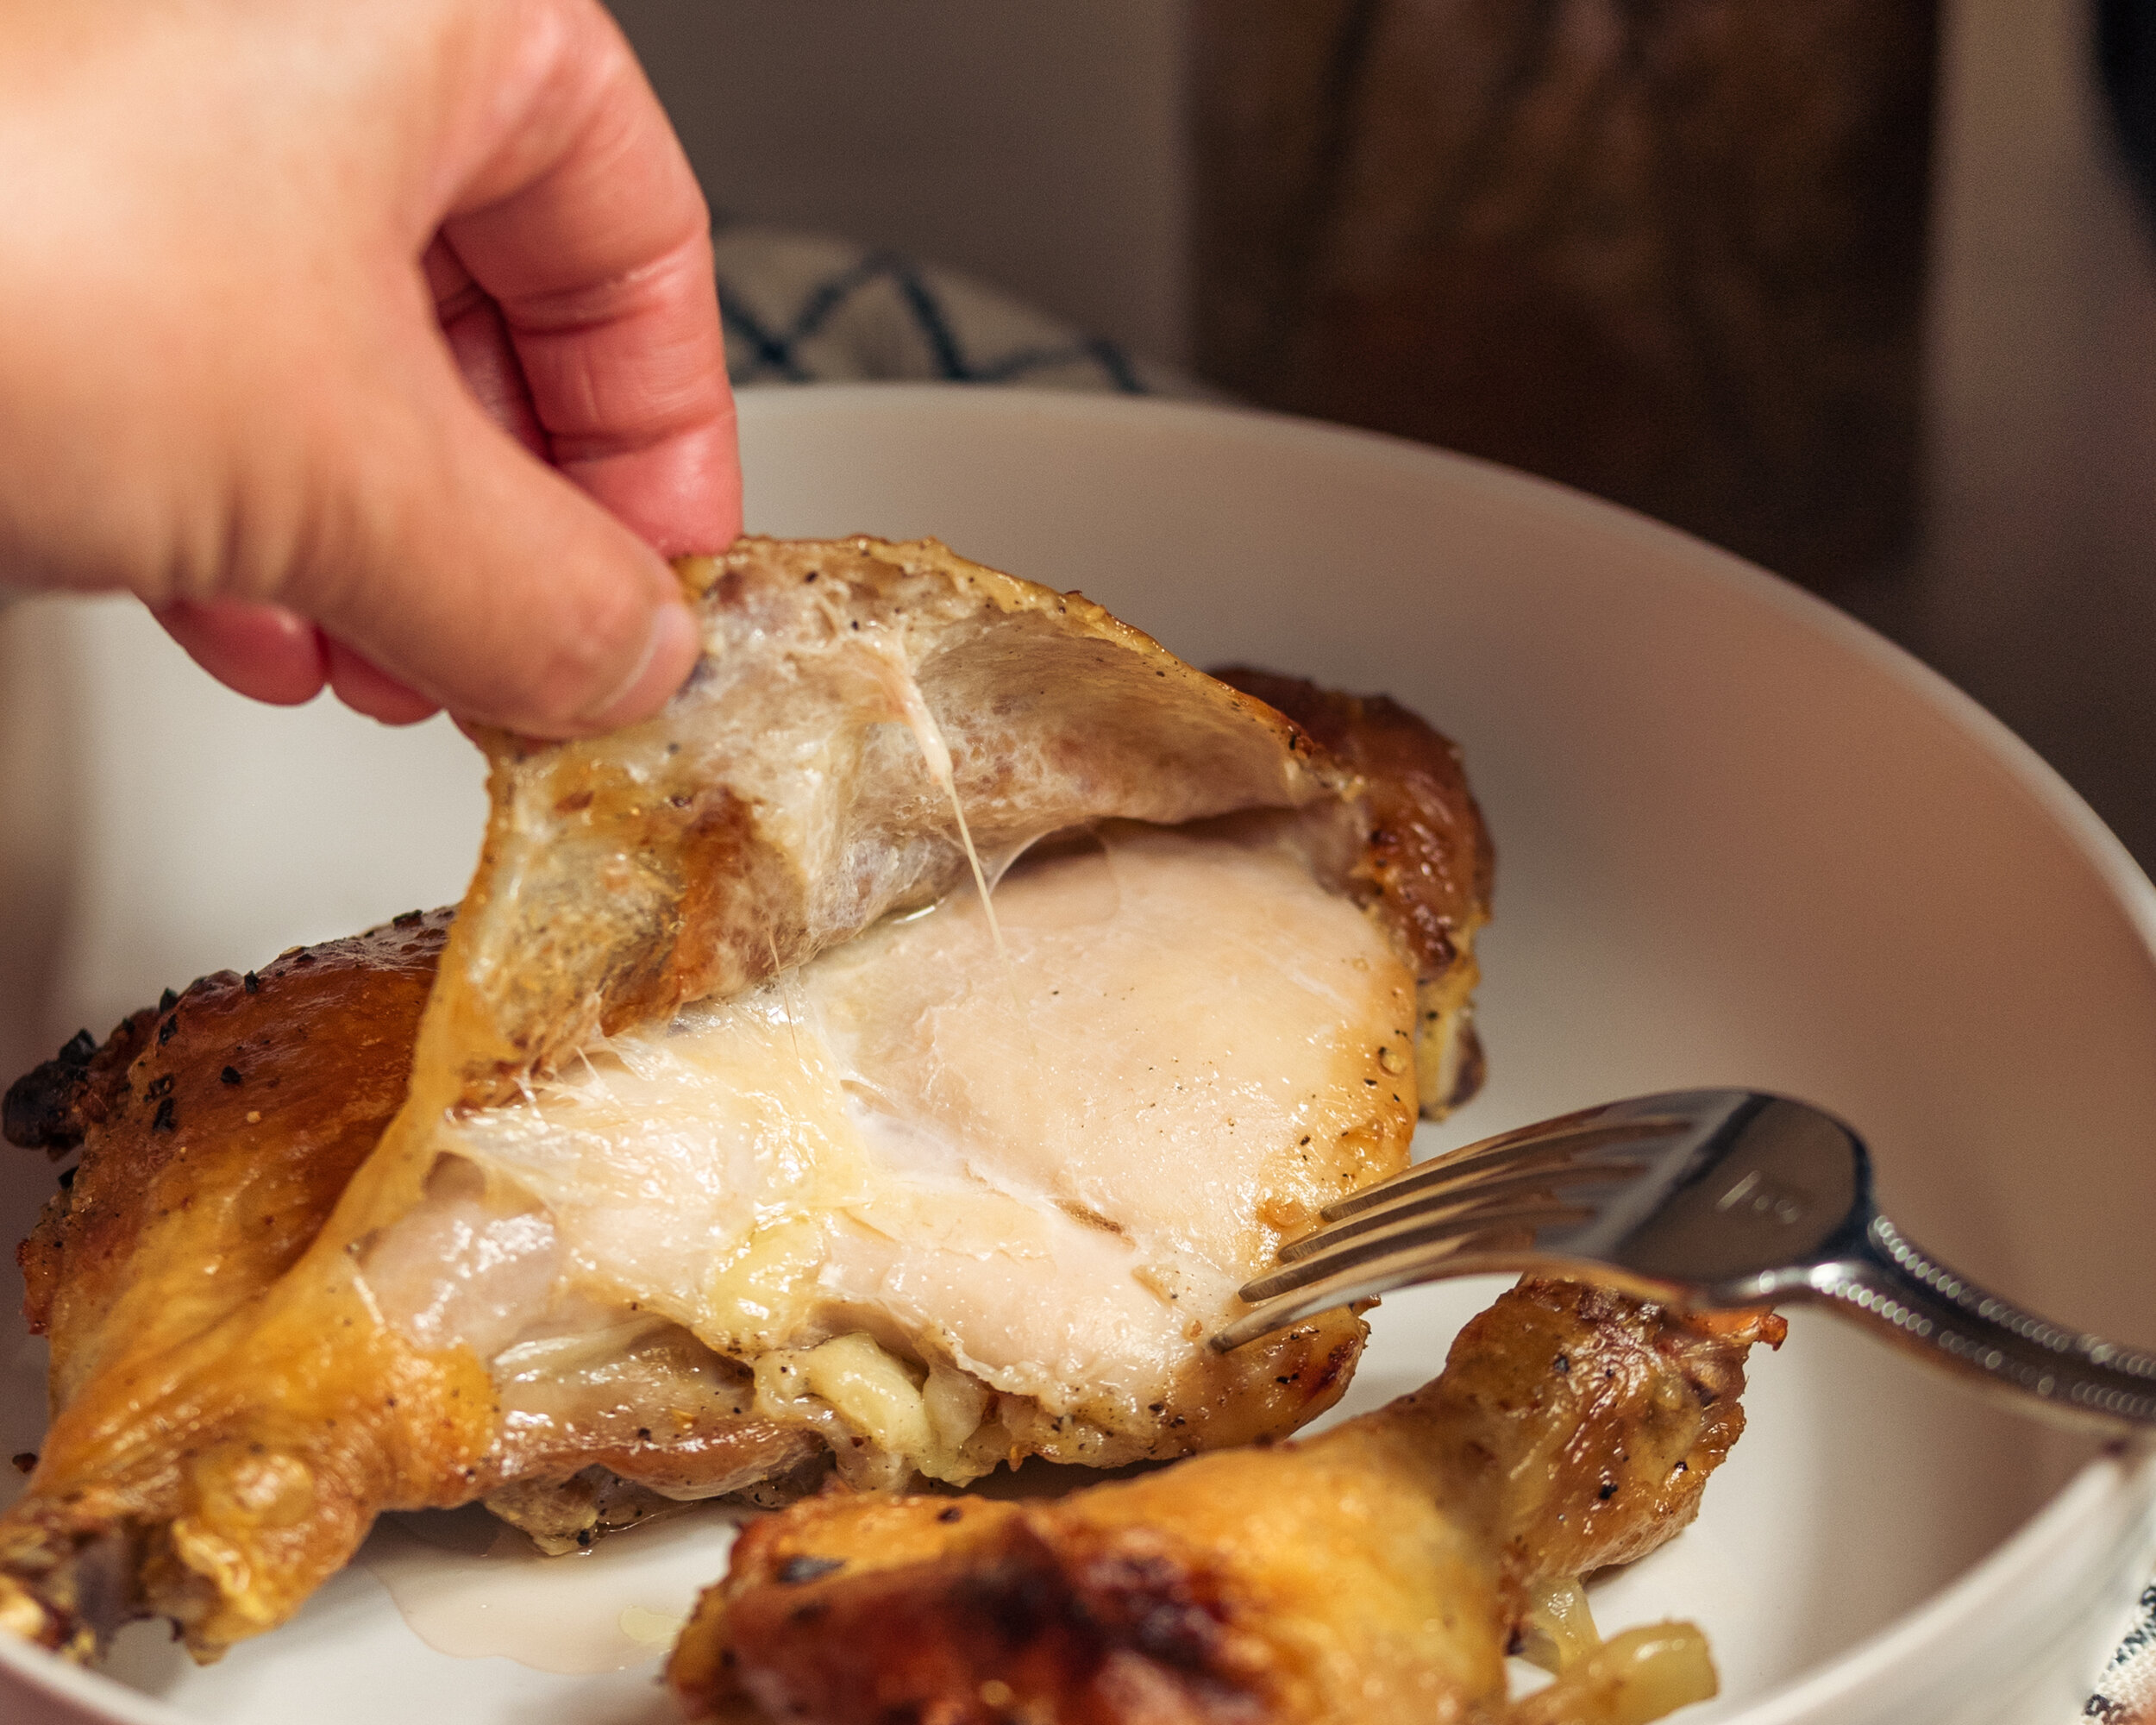
Butterflying chicken quarters makes it easier to have a larger surface area. It makes for the coveted crispy, crackly skin, as pictured here.
THE DO NOTS
In order to butterfly chicken safely, we must acknowledge that chicken can be a breeding ground for bacteria and knives can be dangerous. In order to butterfly chicken quarters, here are some tips to help us be successful.
Do Not use a dull knife
Do Not cut deep through the skin
Do Not use a wood cutting board
Do Not let your cutting board move
MEET THE PLAYERS
Knife

Boning or pairing knife? I find that a pairing knife is easier to control while working with full quarter pieces.
A proper knife that is sharp and comfortable in your hand is really important. The most important thing is knowing your knife.
I don’t have a boning knife, I have a pairing knife. It’s about 3-4 inches long and is perfect for this application.
Bone-in leg quarters have tight little nooks and crannies. The pairing knife gets into those hard to reach areas without over cutting.
Cutting Board
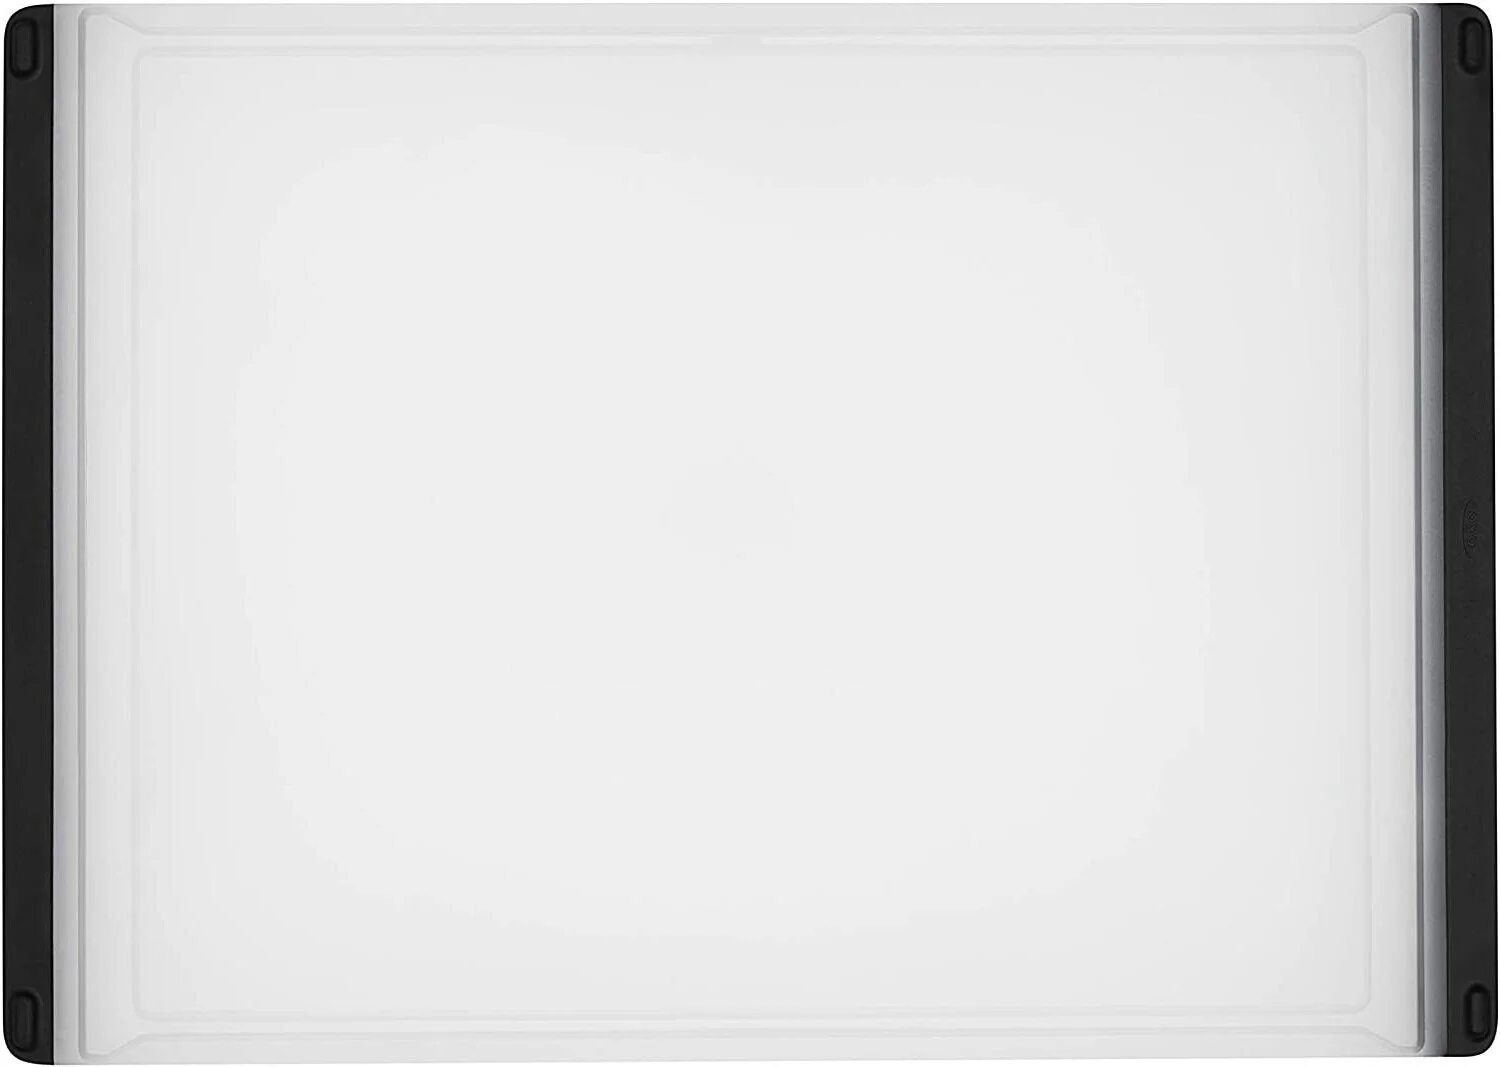
Use whatever cutting board you want, just make to sterilize it thoroughly. I prefer plastic/acrylic because I can run them through the dishwasher if necessary.
The most important thing about cutting boards is the ability to sterilize them. Cutting boards can harbor a ton of bacteria.
Chicken and salmonella aren’t a laughing matter. Whether you decide to use wood, plastic, bamboo, or acrylic, just make sure to clean it well.
I prefer plastic because I can sterilize it in the dishwasher if I need to. Most importantly, make sure there is ample space on the cutting board to do the job.
Paper Towel/Silicone Mat

Silicone mats are great for baking, but double back as a non-slip reusable grip for cutting boards.
Cutting boards tend to slip even with little grips underneath them. When you’re working with raw chicken and a knife the last thing you want to do is have your cutting board slip out from underneath you.
One trick to have a secure cutting board is to use a silicone mat or a wet a paper towel. It doesn’t have to be fancy, so if you have a paper towel - use that.
All you do is wet it, wring it out and place it underneath the cutting board and on the counter. If you push your board it should stay put.
If your chicken happens to be wet, use a paper towel to grip your chicken so it doesn’t move
LET’S GET STARTED!
Start by taking the chicken and flipping it meat side up. The outer portion of the chicken quarter should be touching the cutting board.

Start with the outer part of the the chicken quarter, touching the cutting board.
We work with the leg first because it’s more difficult. Once the tendons have been severed it’s easier to work around the quarter.
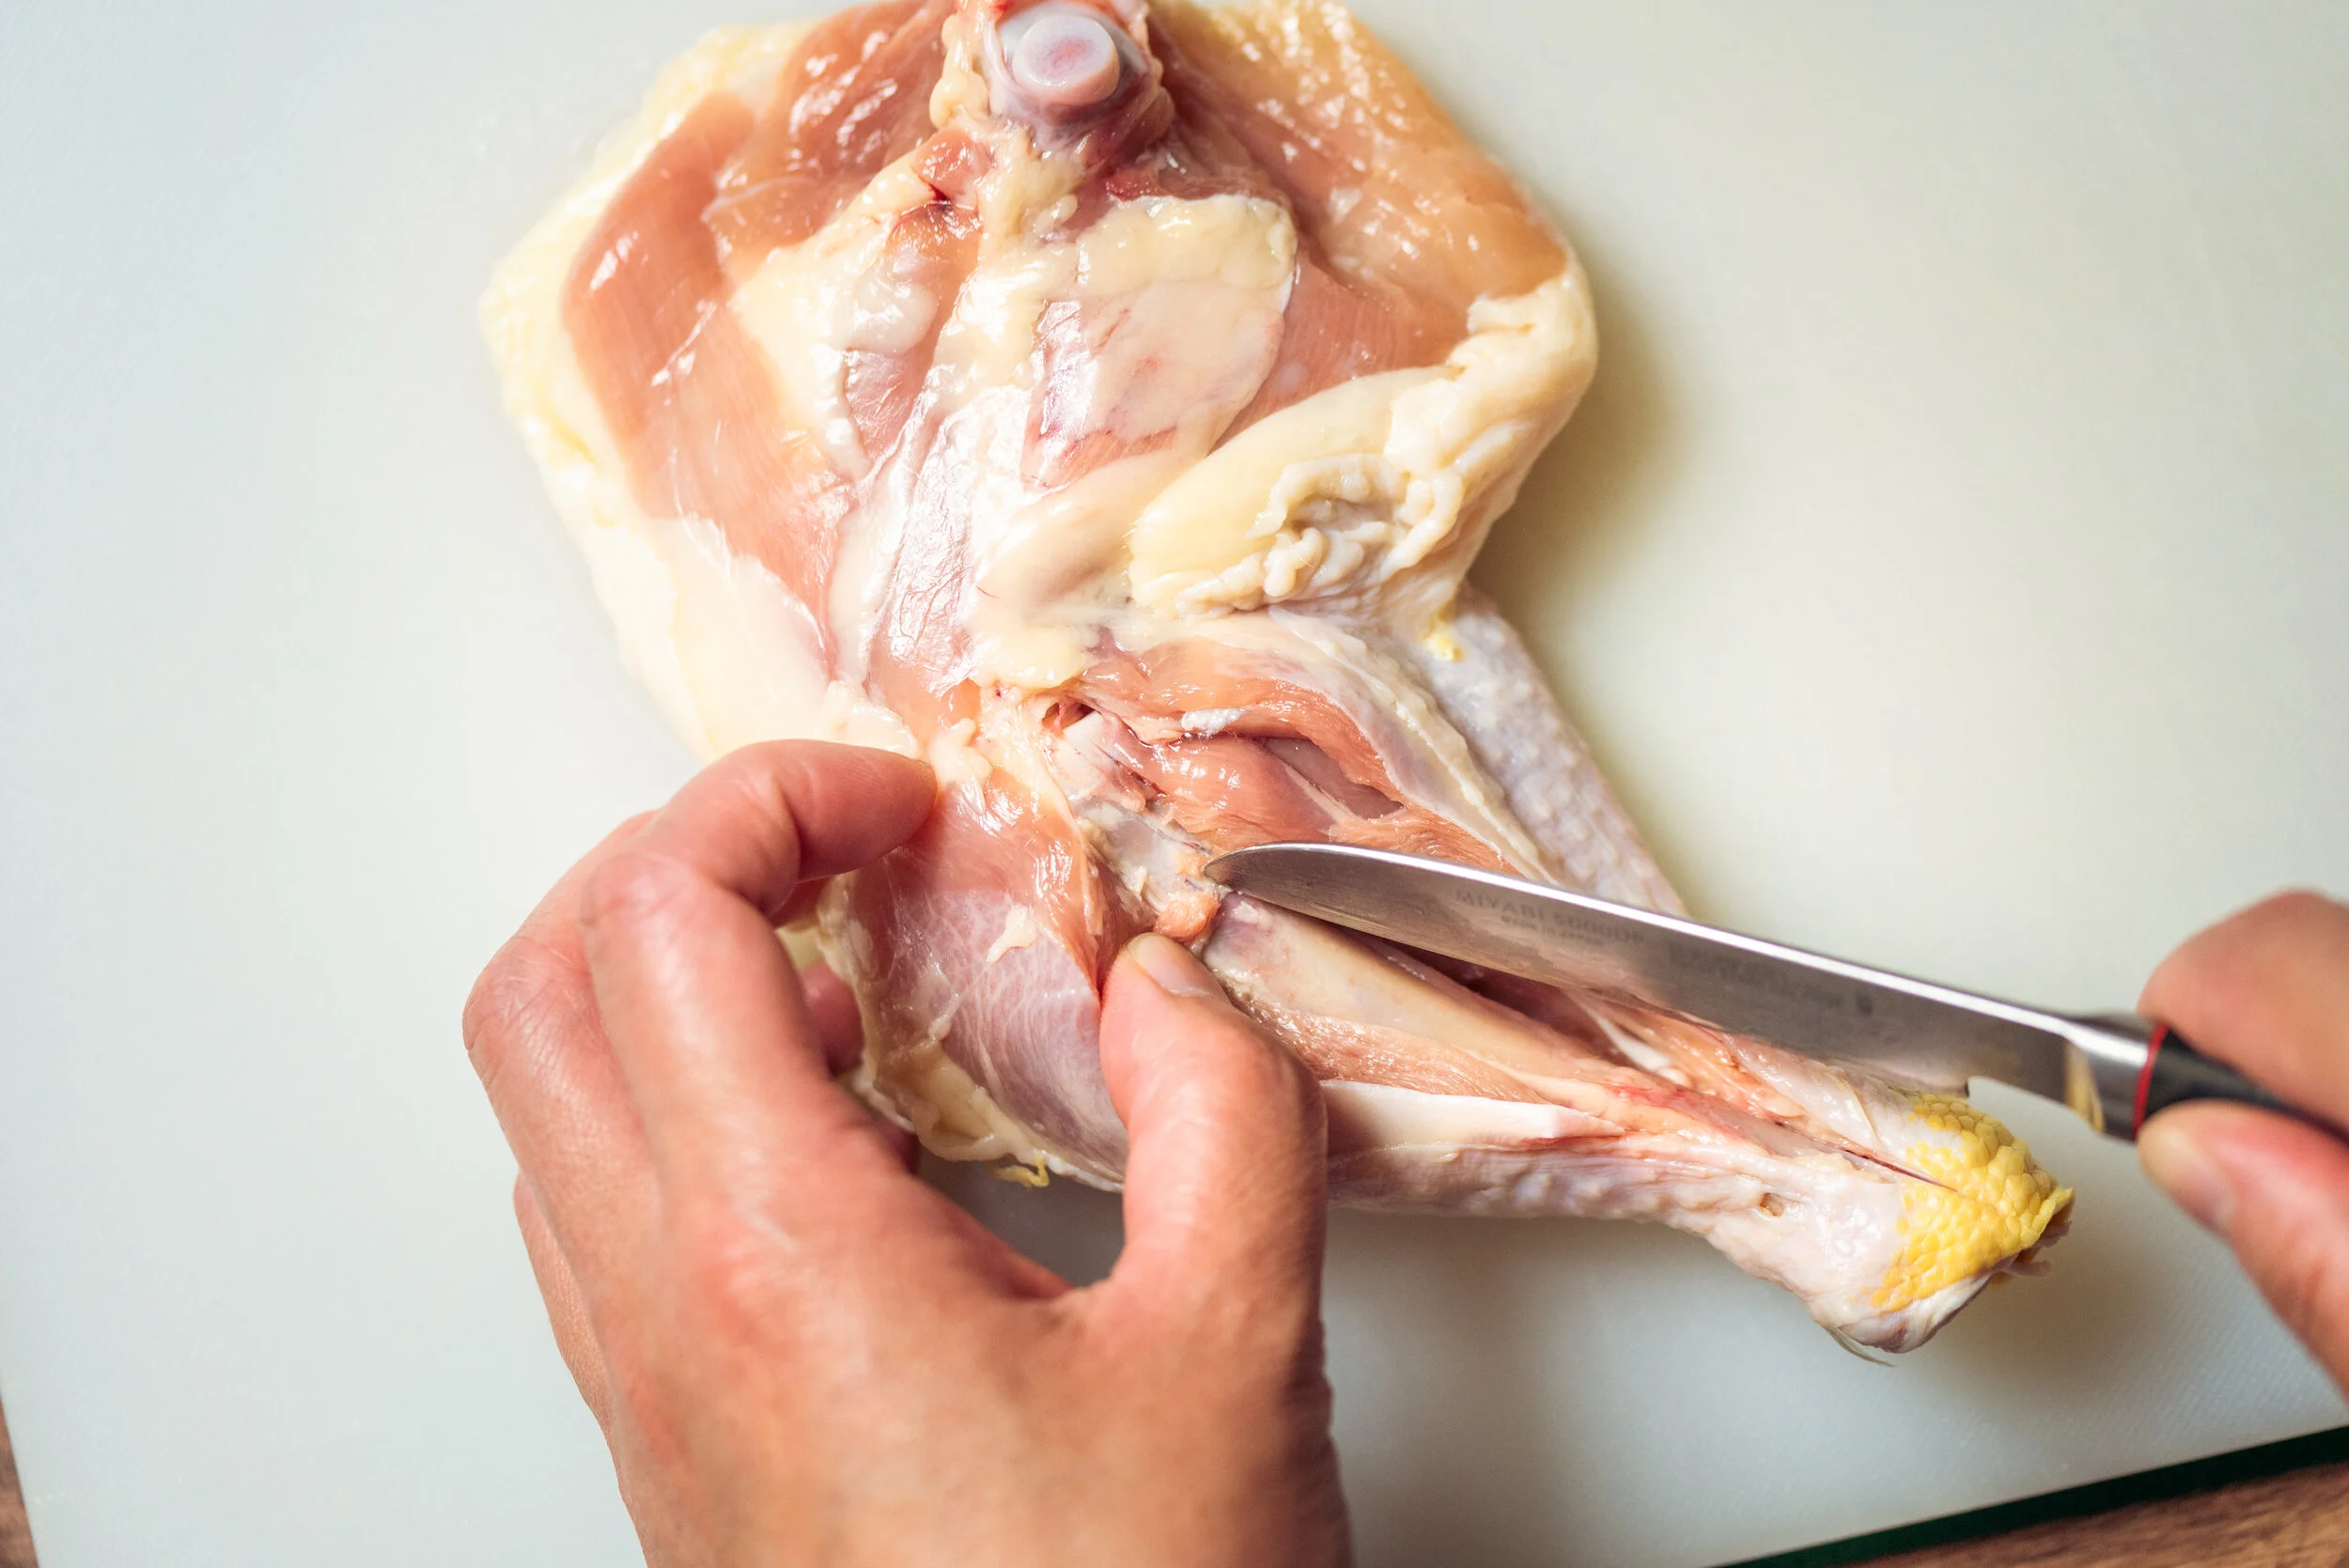
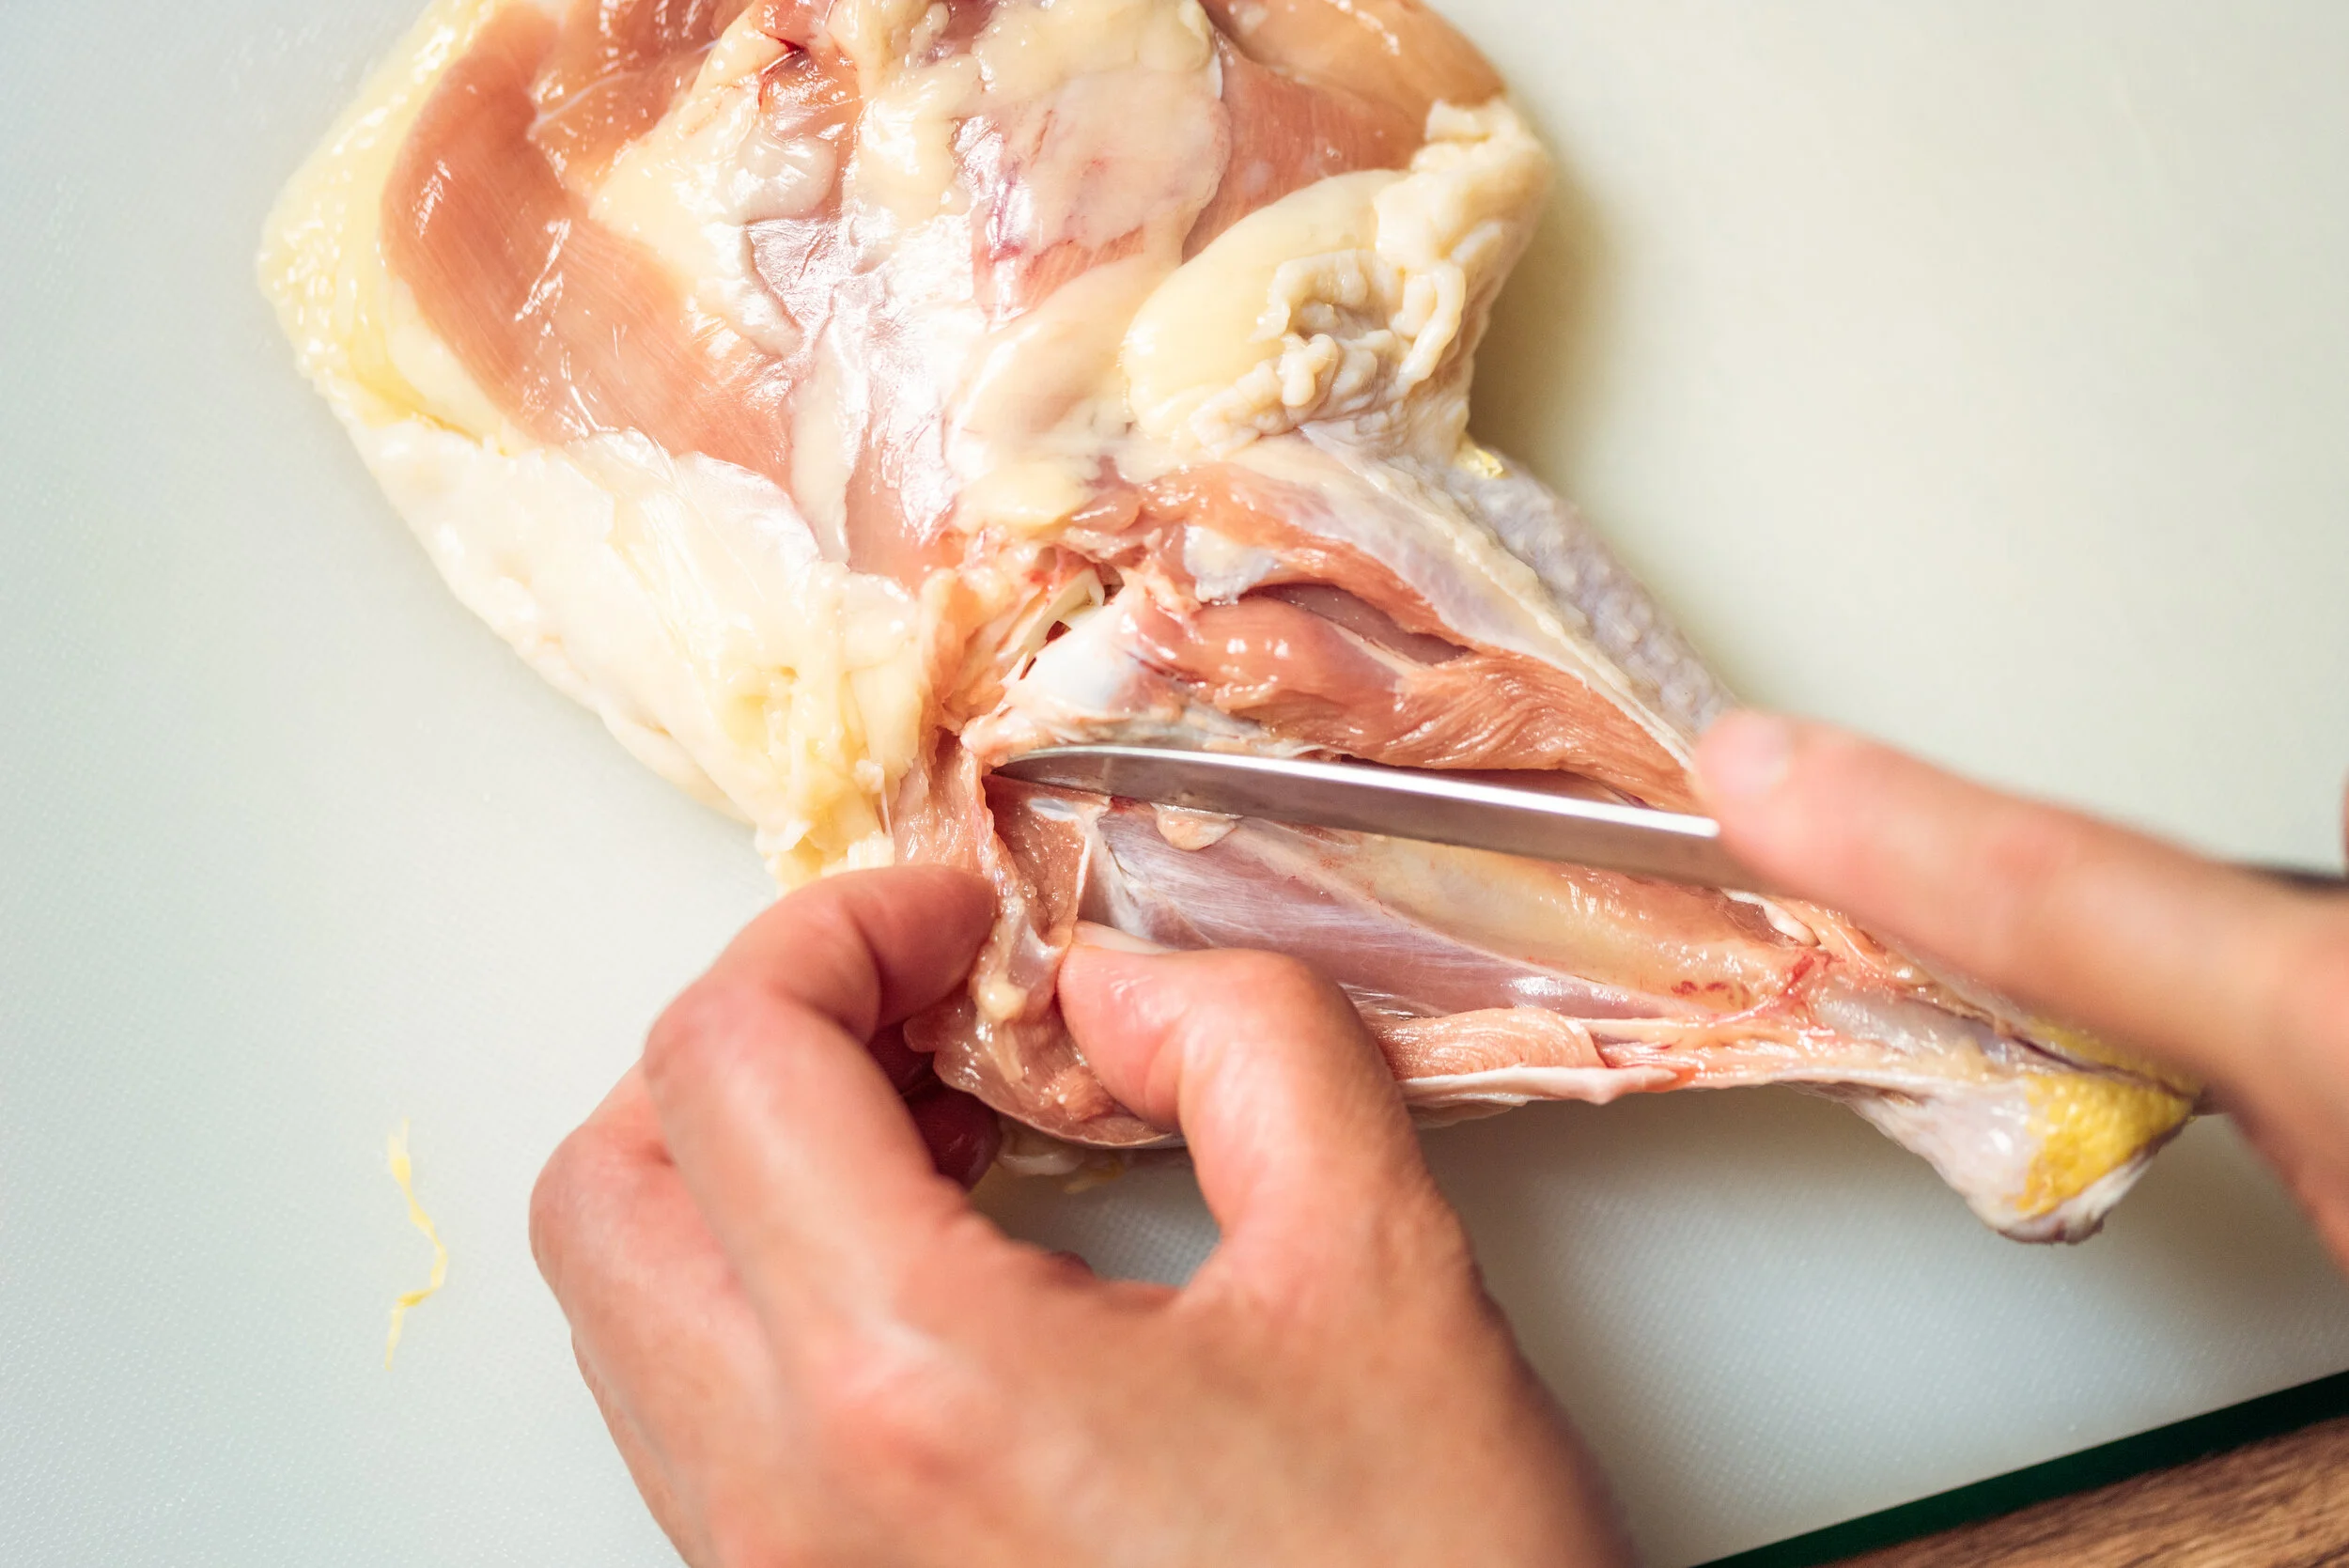
Find the center of the quarter where the leg and thigh bone meet. Holding the thigh with one hand, run your knife from the top of the leg bone down to the tip of the leg bone.
This part can be really tough because the muscles around the leg can be really sinewy.
If you need to run your knife down again to cut clean to the bone, do it. You want to make a definitive split in the center.

Find the center of the leg quarter, where the thigh and leg meet. Carefully cut down towards the end of the leg.
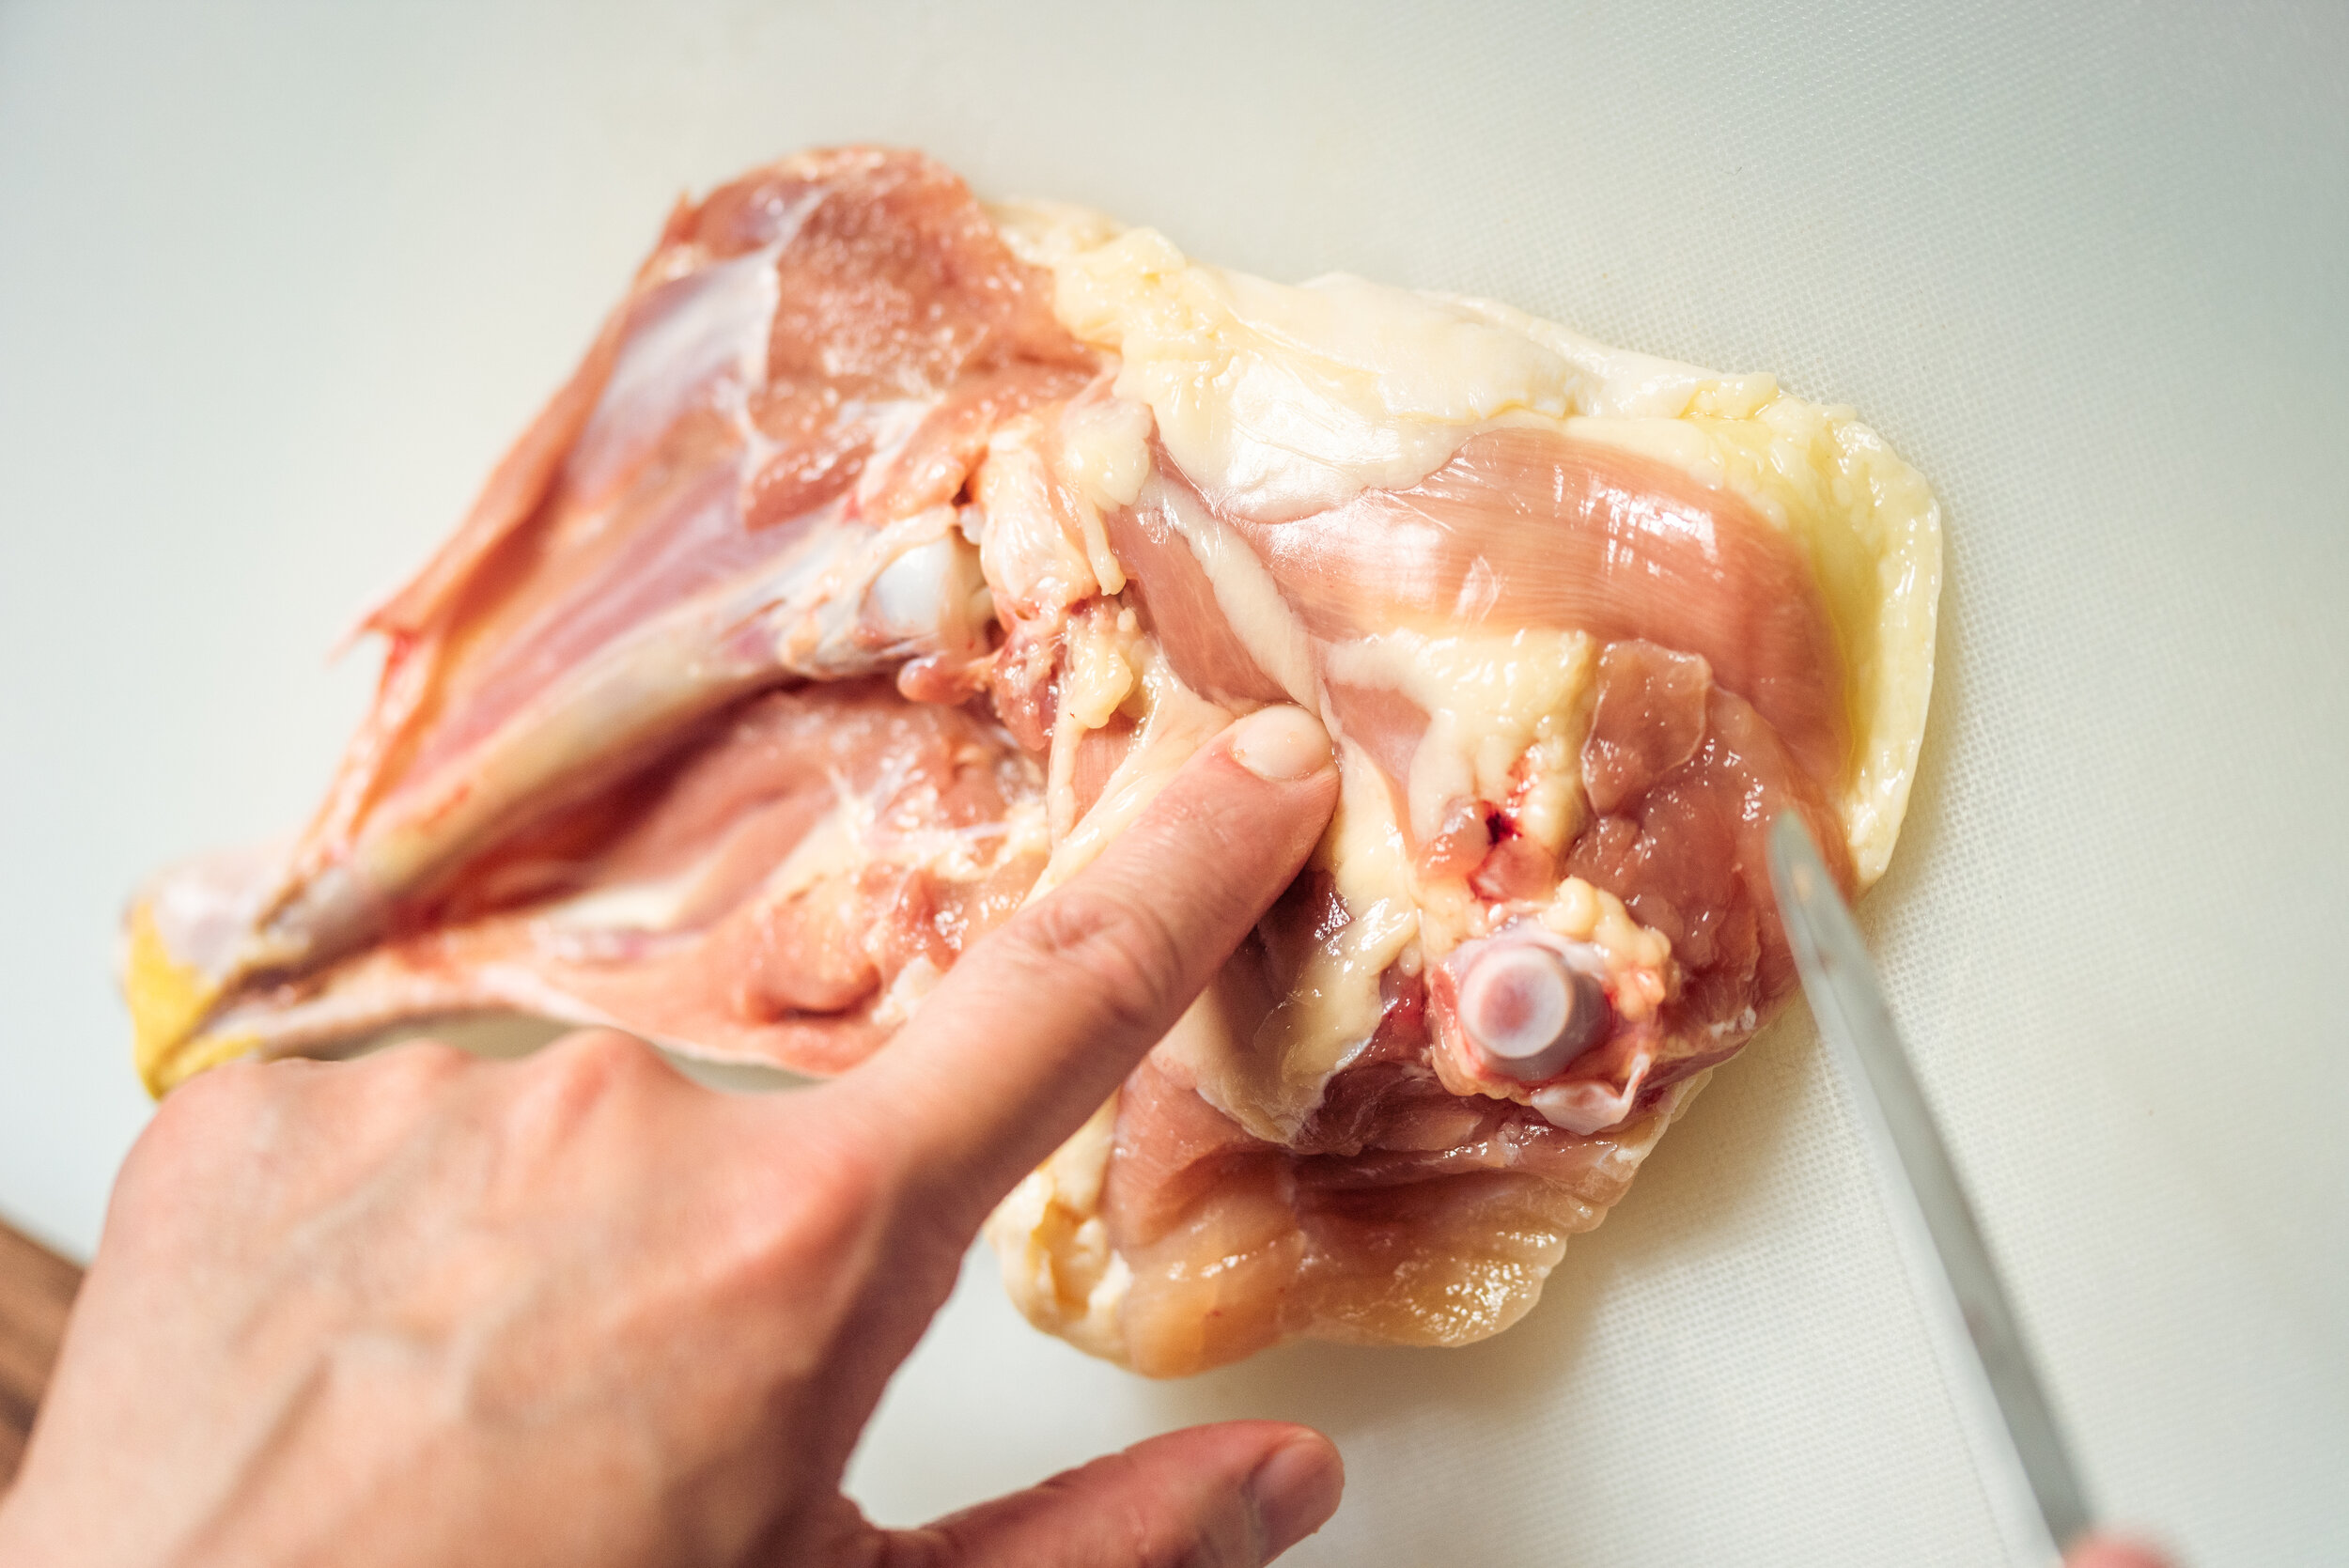
We want to go back to the top of the leg bone and disconnect the tendon. This will help to open the leg so we can cut around the joint.
Go back to the top of the leg bone and find the tendon. Cut through it. It will help to open up the leg.
Cut around one side of the top of the leg bone disconnecting the tendons.
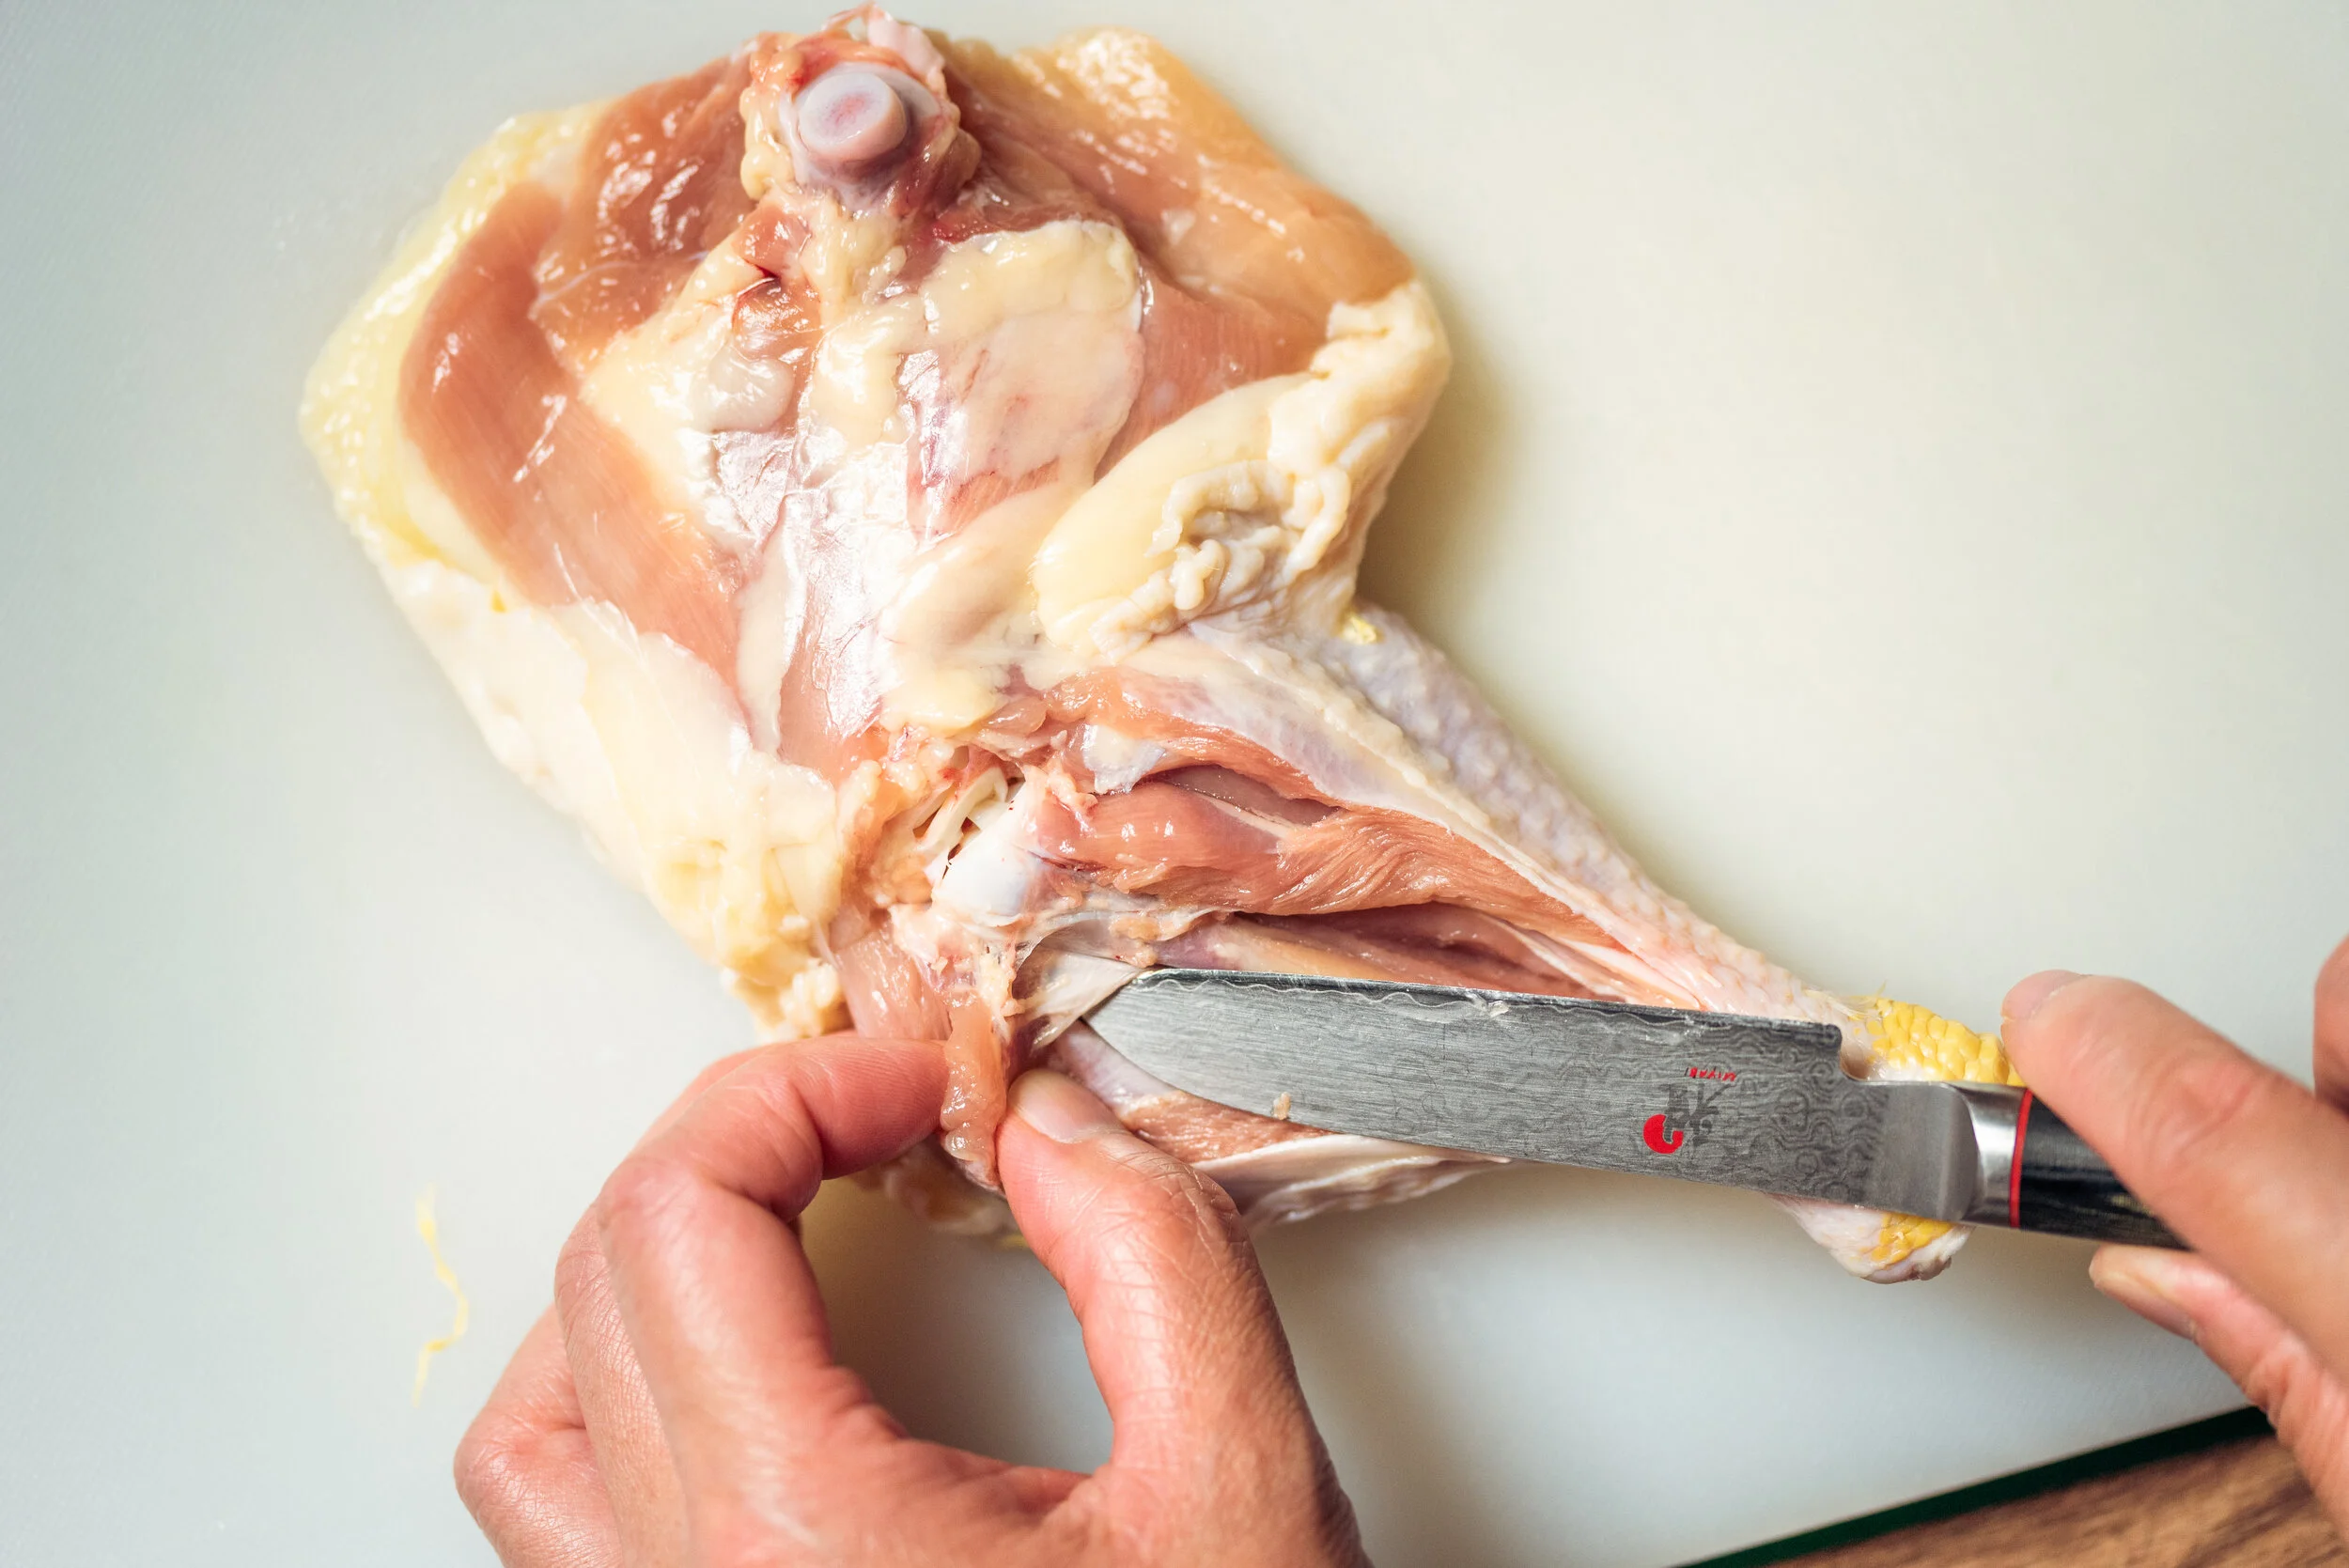
Moving to one side of the leg bone, cut the tendon.
Continue to cut the tendons attached on one side. You should see the leg open up more on the same side.
Push down the meat from the leg, following the side that has been cut, disconnect additional tendon.
Repeat and cut the tendons on the opposite side. There are a total of six tendons.

Repeat on the opposite side, cutting through the tendons. There are 6 in total.
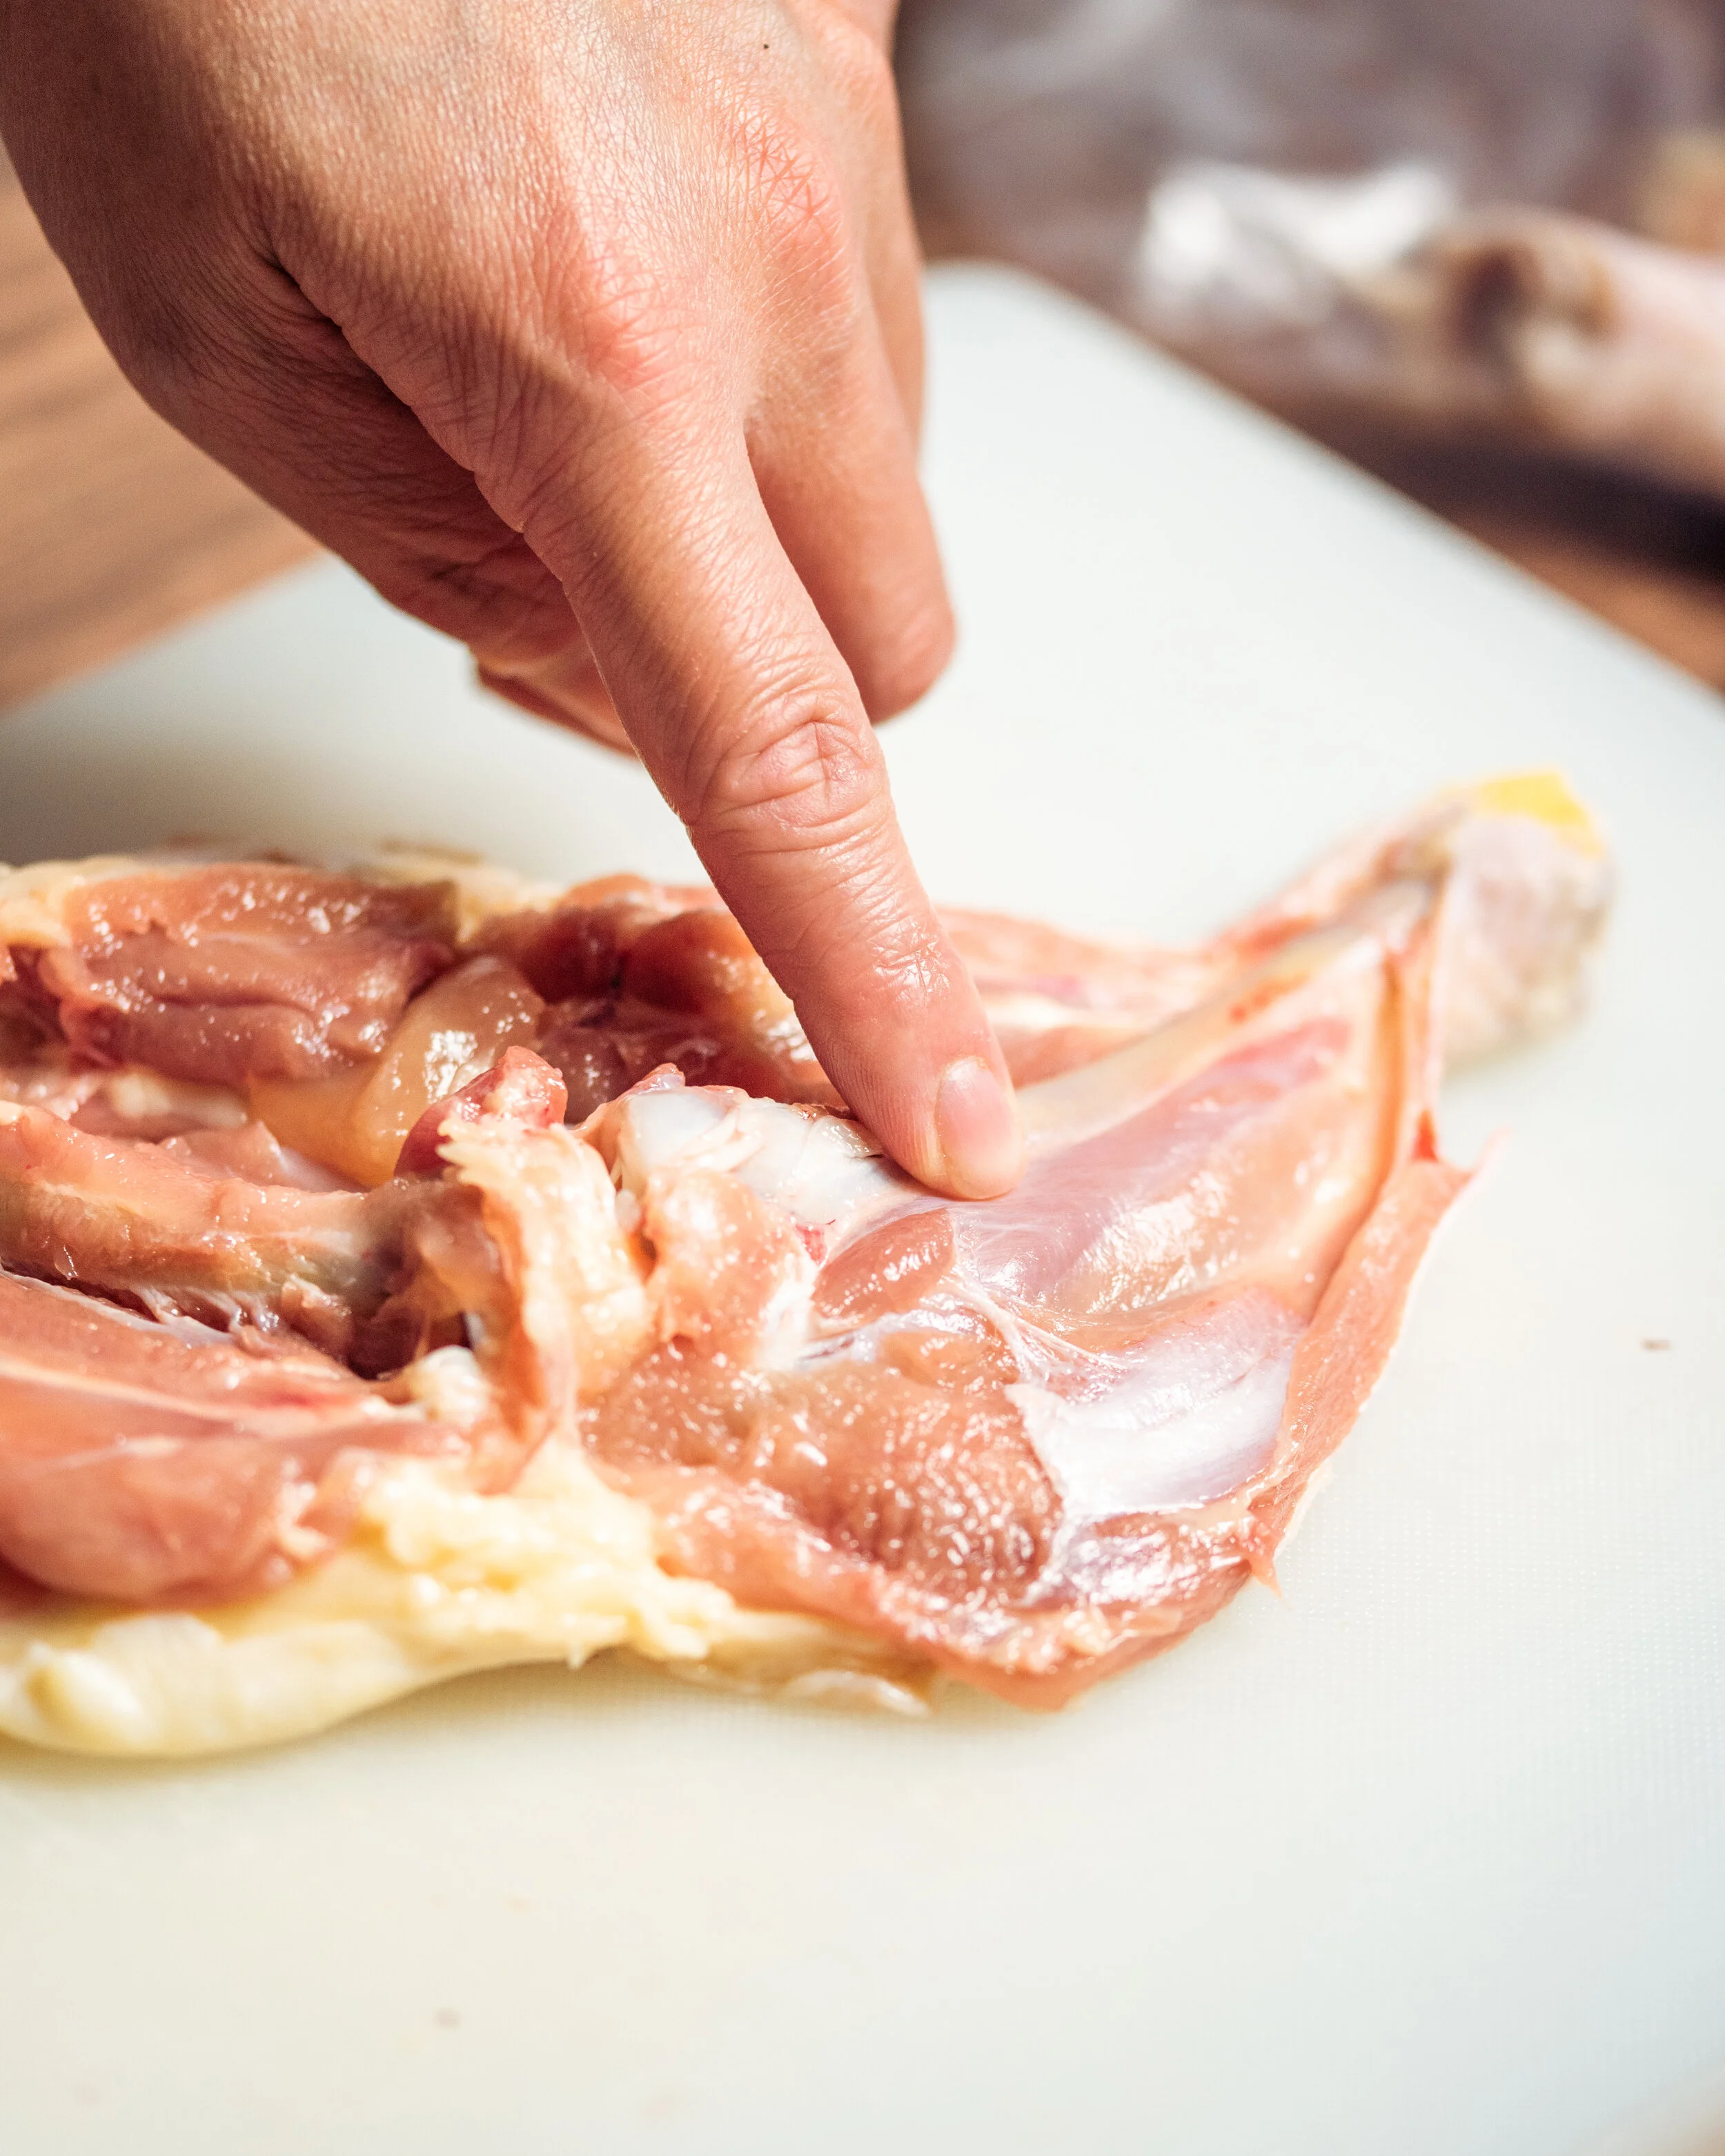
Once you’ve disconnected the tendons, run your finger past the leg bone and onto the thigh bone.
Once you’ve disconnected the tendons in the leg, run your finger back up to the thigh bone.
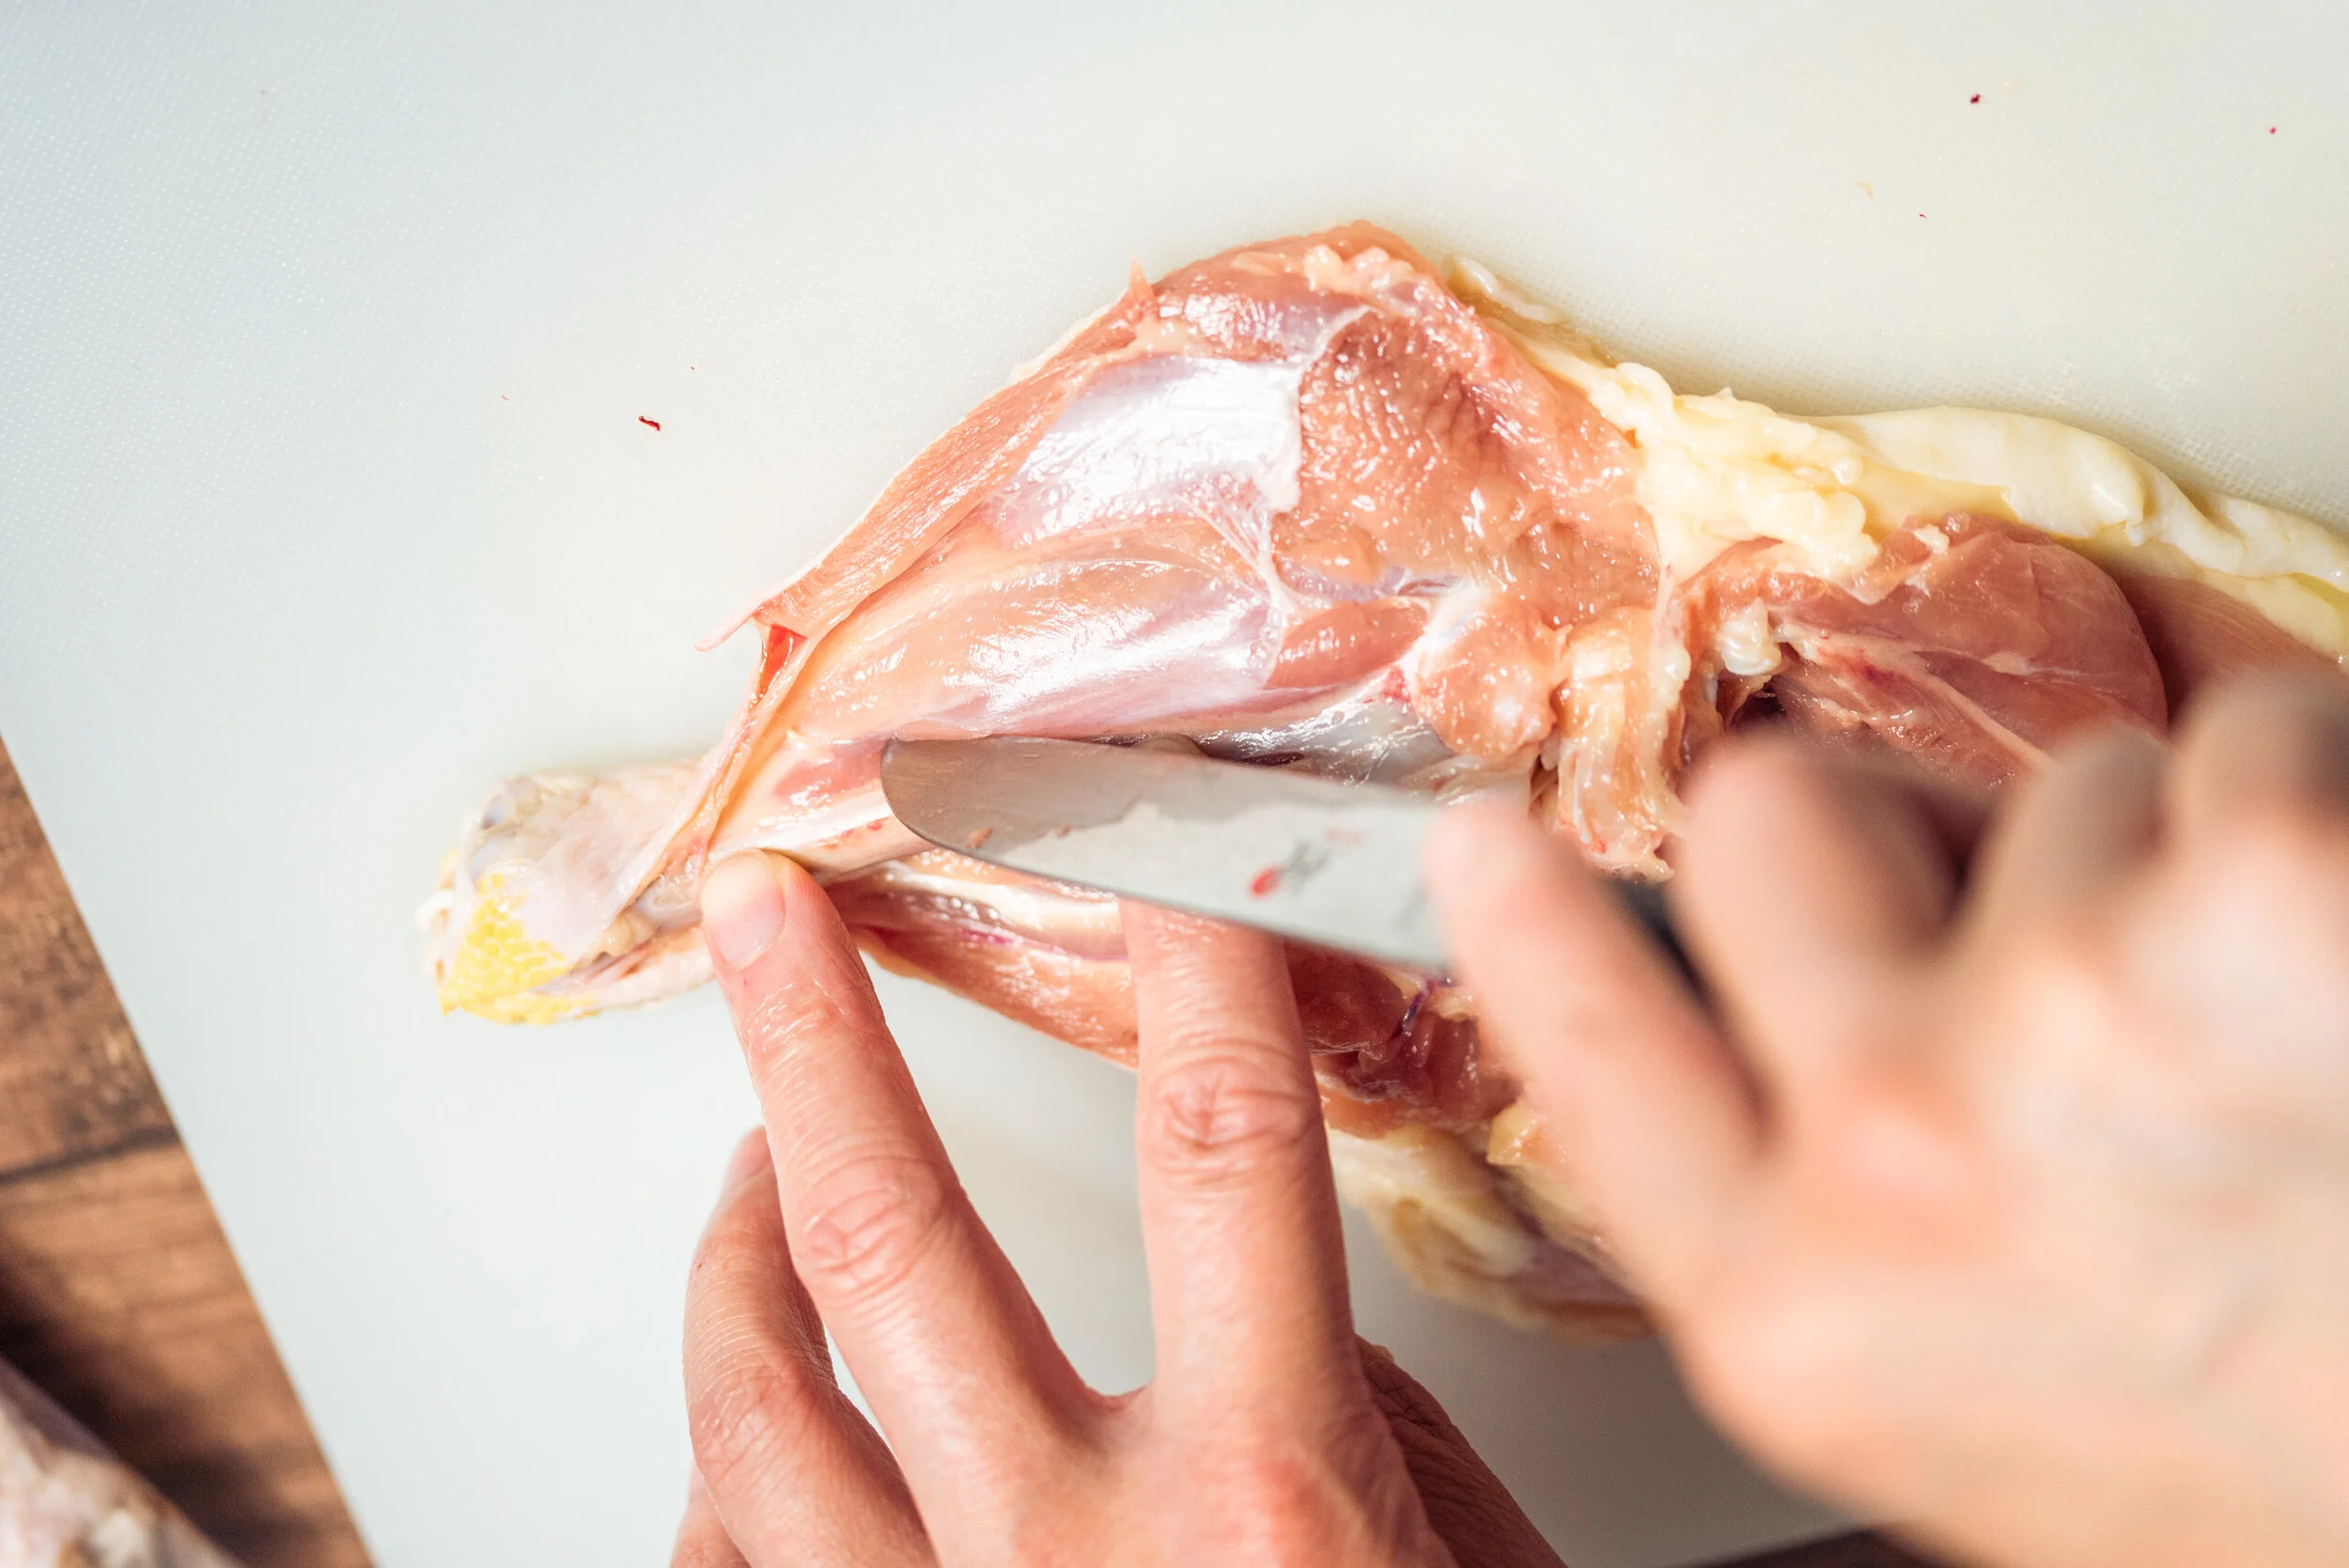
We want to cut on one side of the thigh bone, making sure not to cut all the way through.

Using your knife cut on one side of the thigh bone. You want to release the meat from the bone without cutting all the way through to the skin.
Taking the entire quarter, flip it so that the leg is pointing up and away from you. The thigh should be closest to you. Cut the tendon that connects the meat to the thigh.
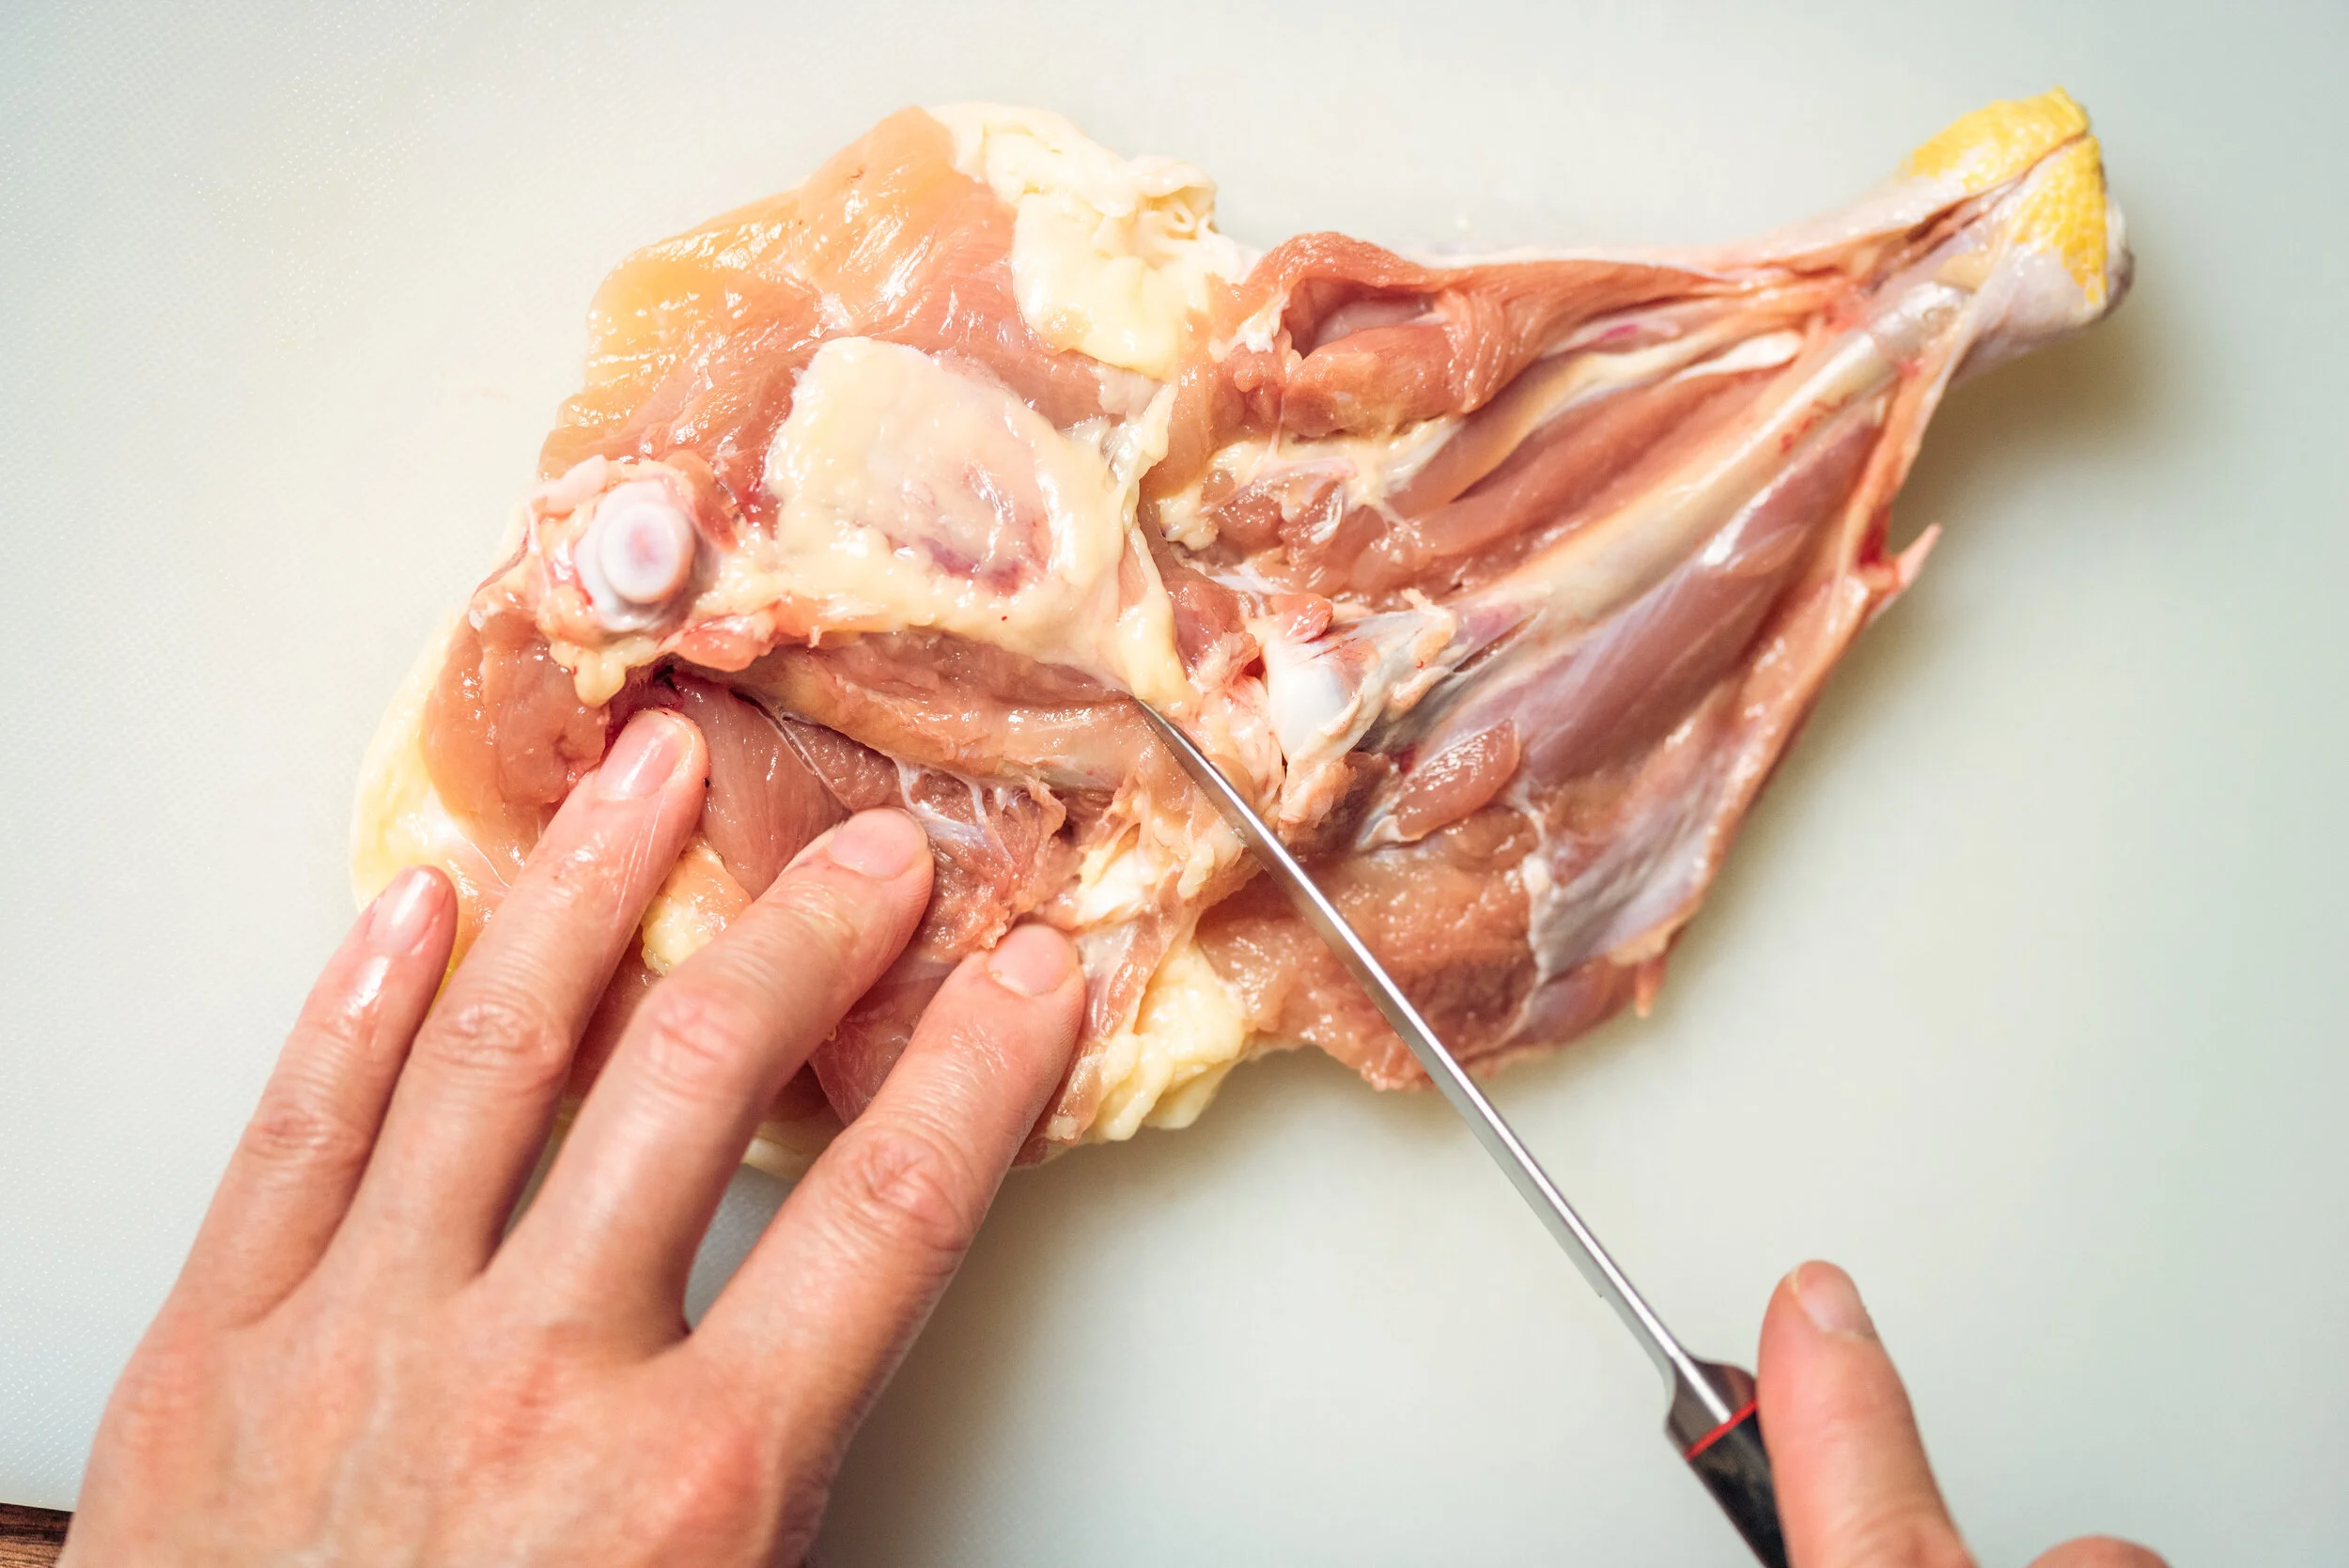
Flip the leg so it’s away from you. Cu the tendon that connects the meat to the thigh.
You should be able to see the tendon that connects the leg to the thigh. Make sure to cut both sides of the tendon that connect to the leg and thigh.
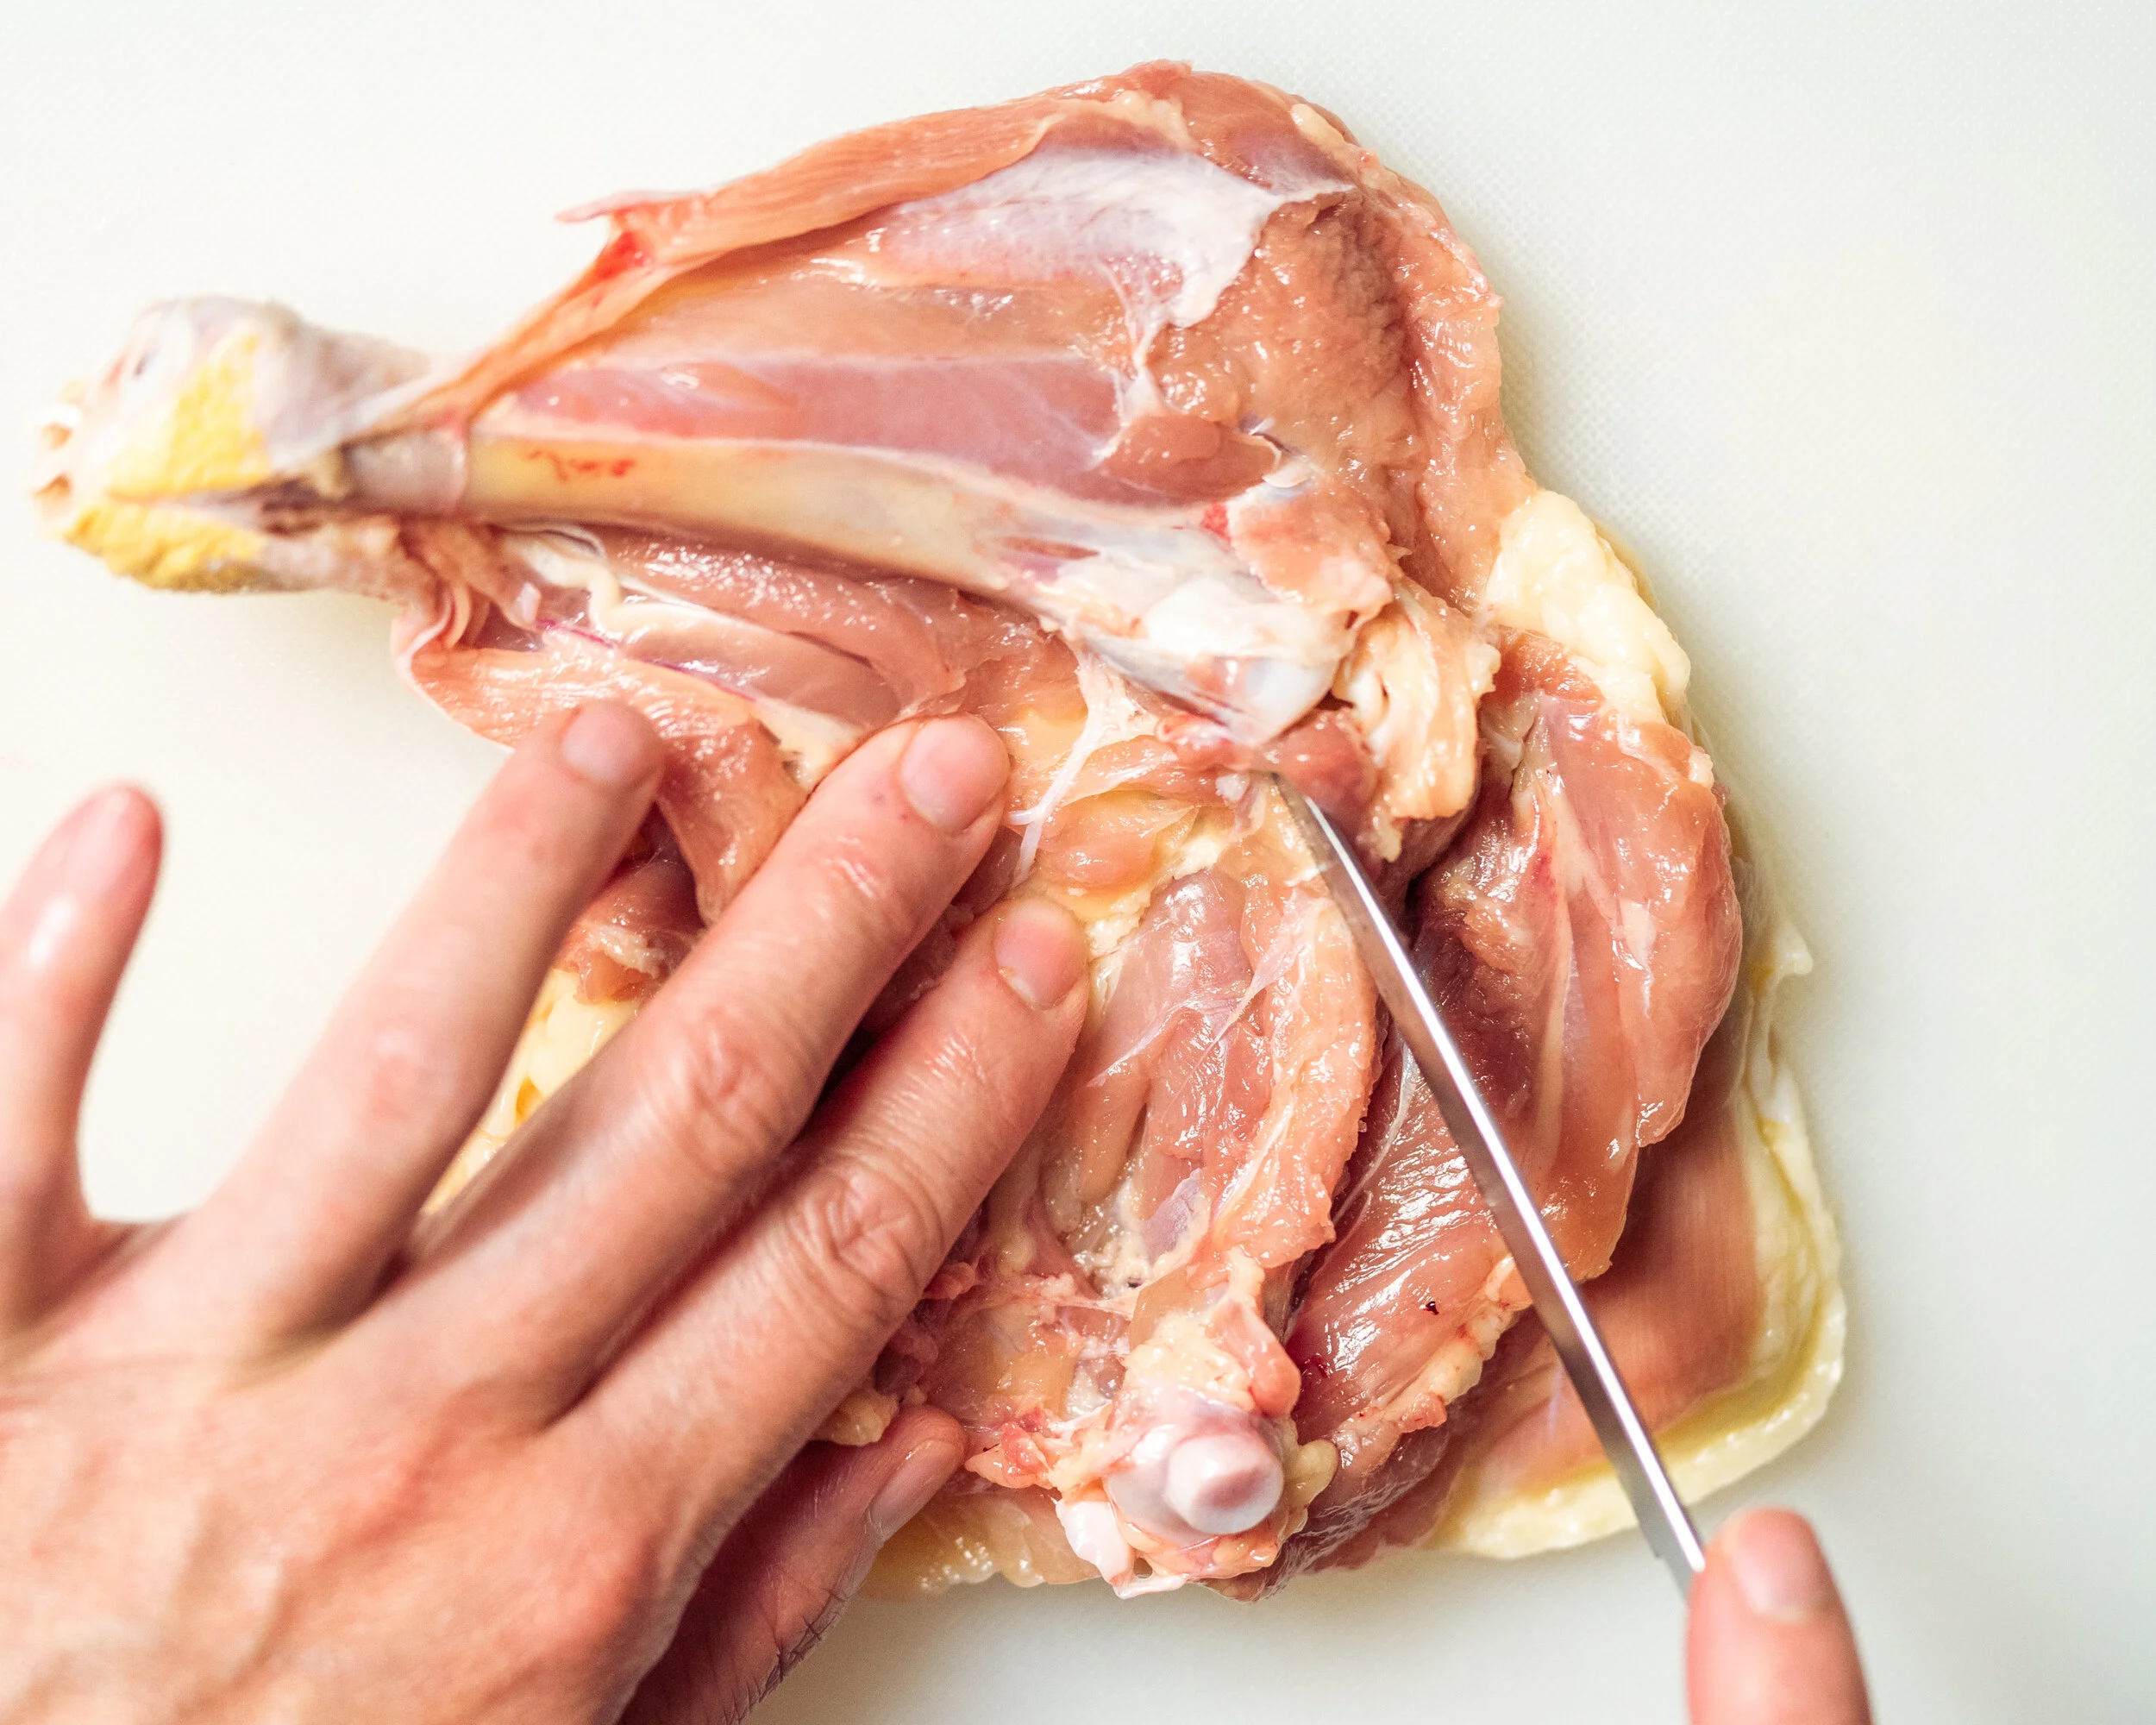
Cut the tendon that connects the leg to the thigh.
Once you’ve done this, go back to the leg bone. It will be easier to cut the meat away from the leg bone.
Once you’ve dismantled all the tendons go back to the leg bone.
Start with one side of the leg and cut parallel to the bone down towards the thigh. Repeat to the other side.
Cut alongside the leg bone to disconnect the meat, allowing it to lay flat. Repeat on the other side.
You should now have a butterflied, bone-in, chicken quarter ready to marinade. The best part is the surface area of the chicken.
It is now ready to be transformed into the highly coveted golden, crispy, crackly skin with whatever marinade you choose!

Your chicken should lay flat, be easier to marinade, and cook more evenly. The best part is the surface area for crispy, crackly, chicken skin!
Look at the difference between a whole chicken quarter (left) and the butterflied chicken quarter (right).
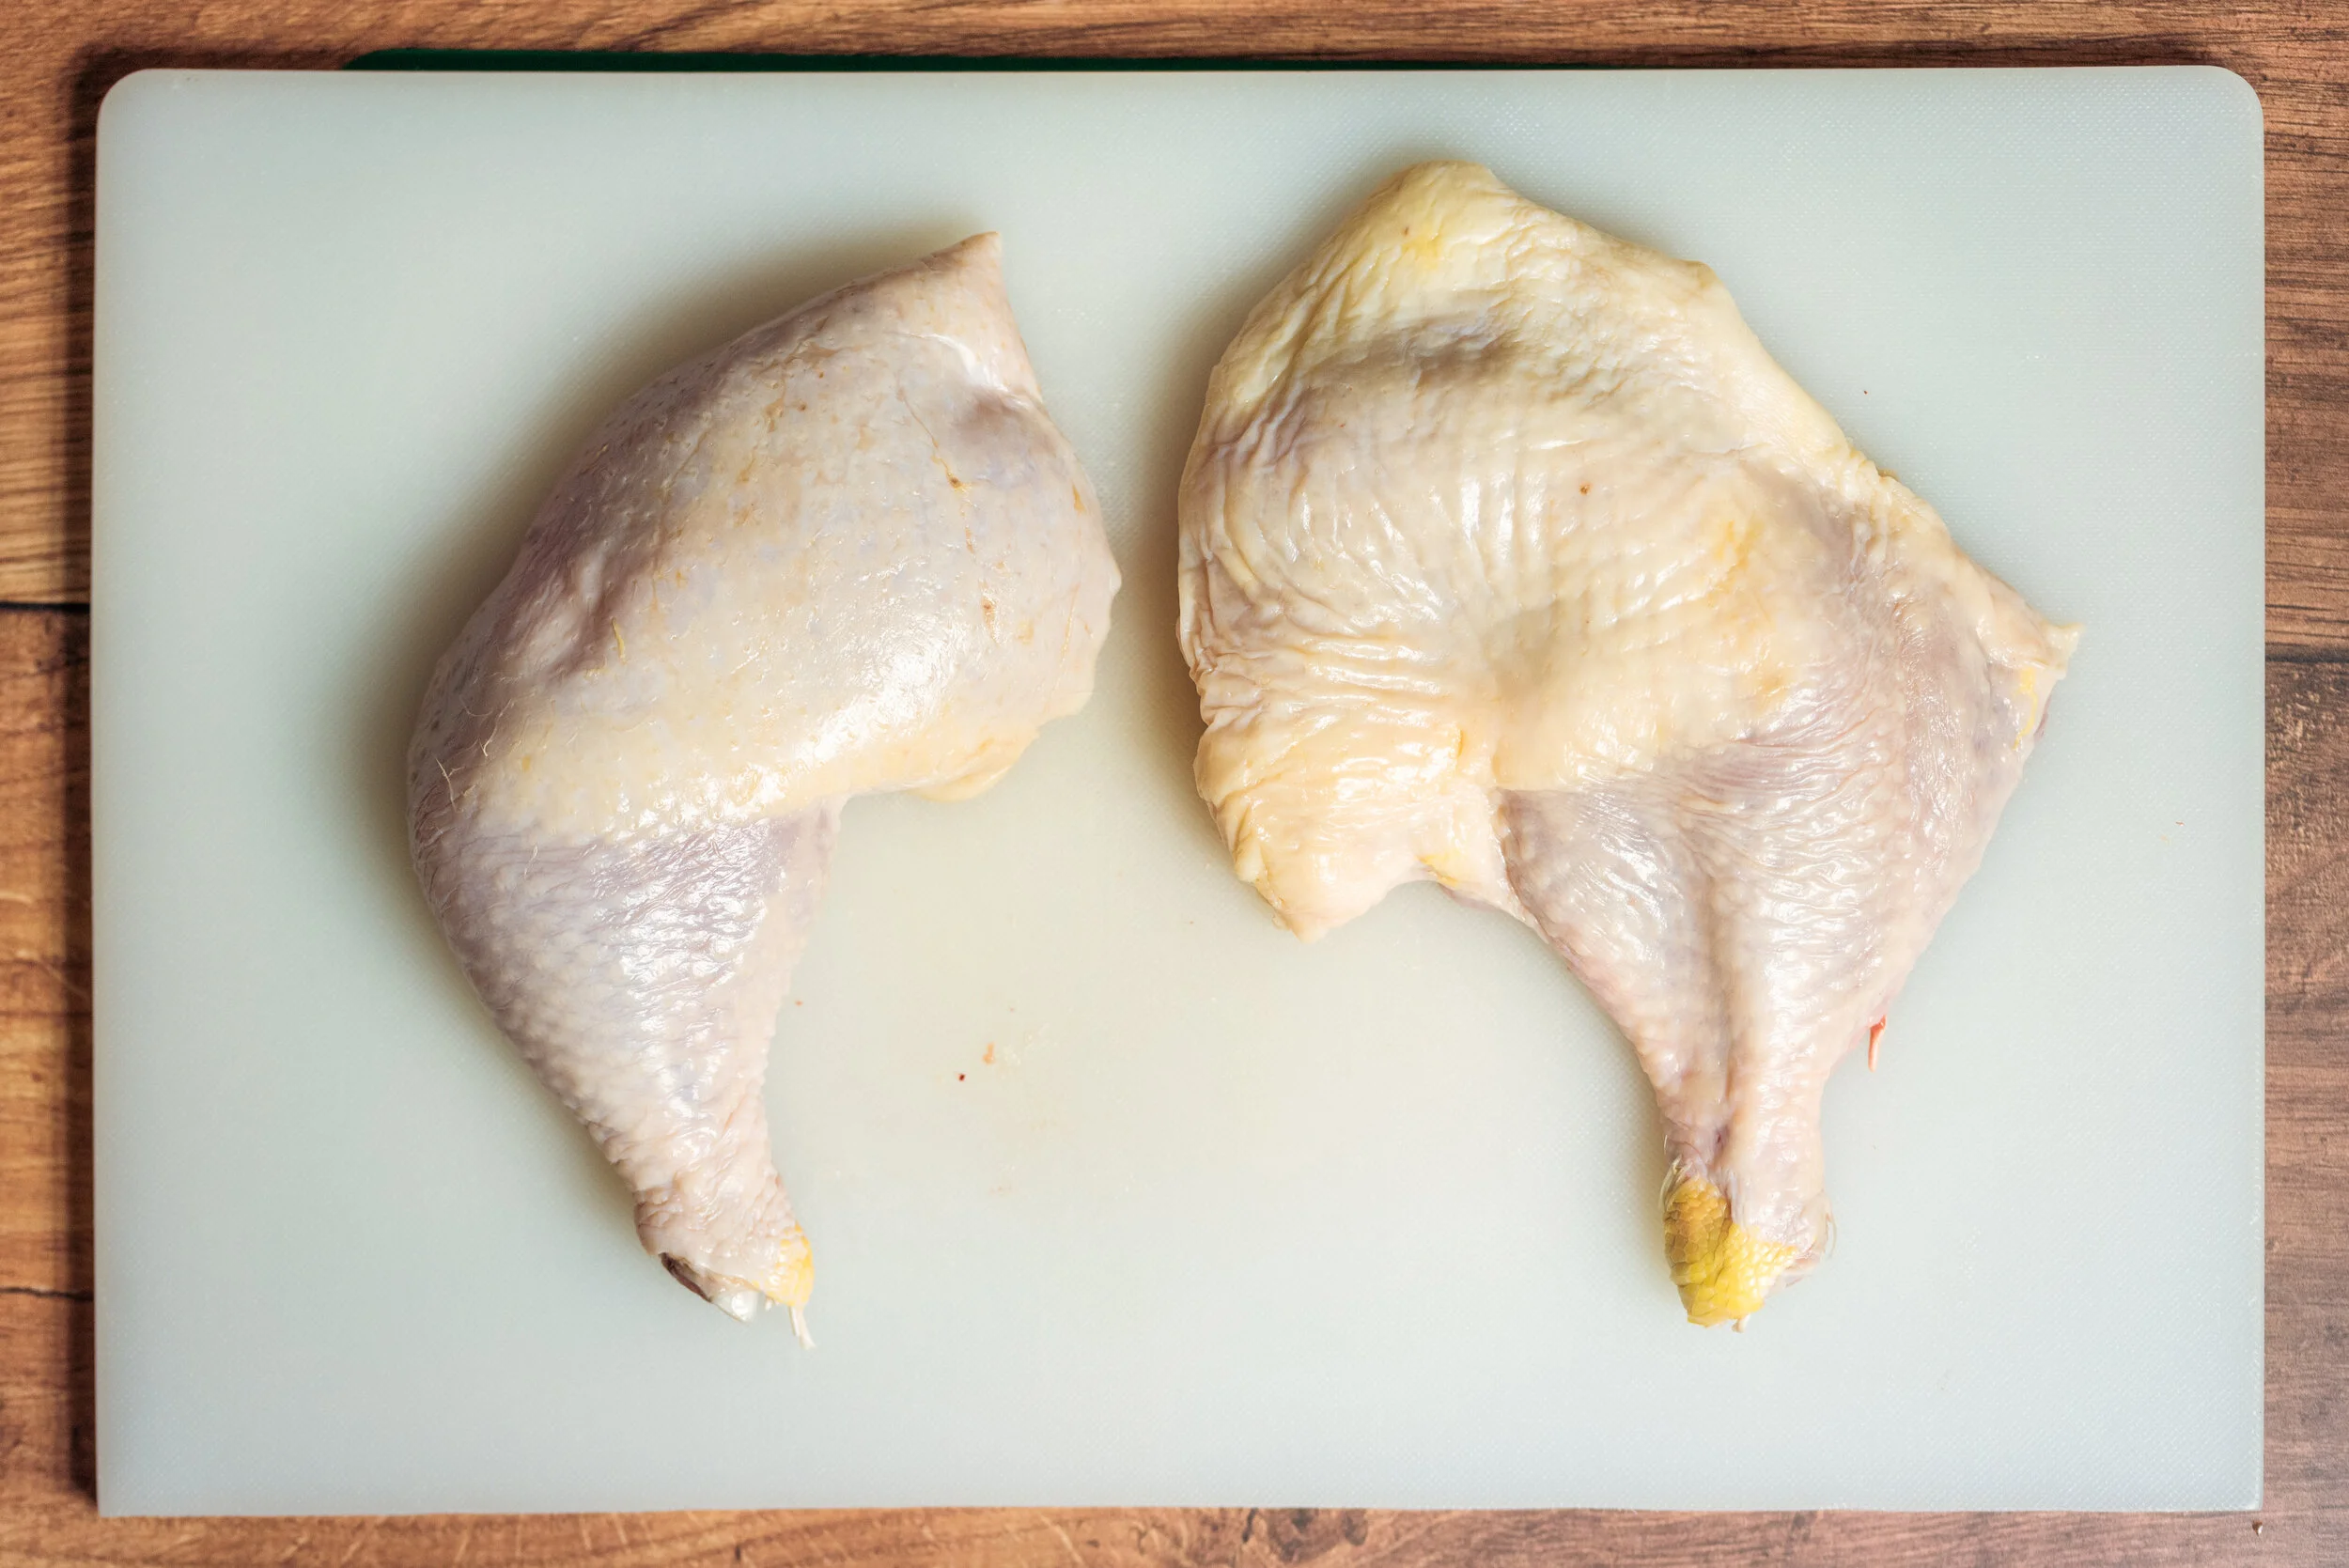
You have officially butterflied a chicken quarter!